
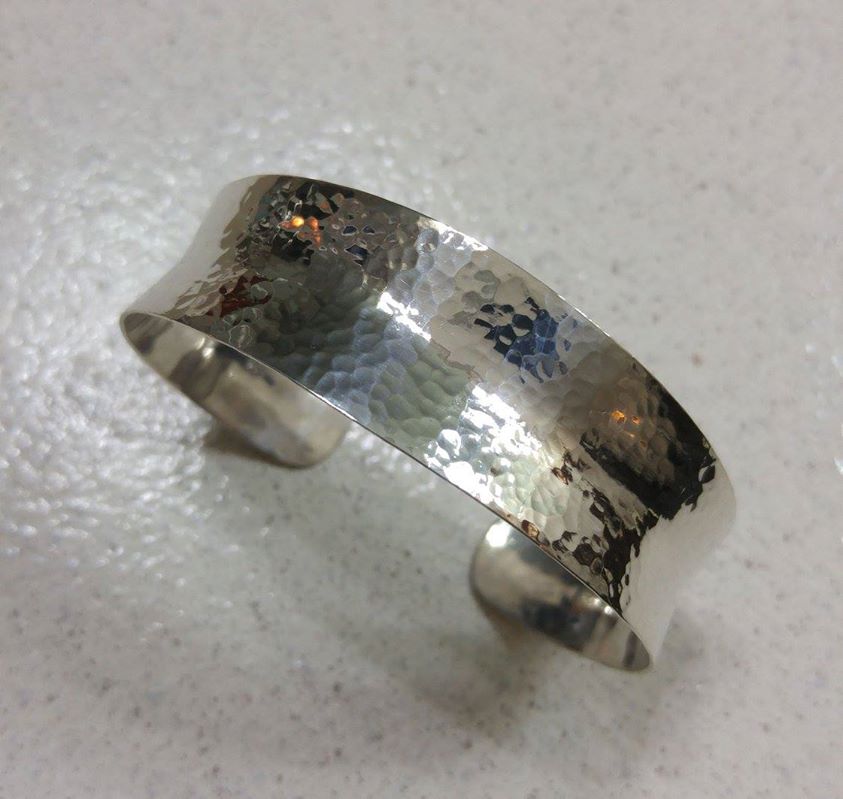
After forging the cuff, leaving in the hammer marks from the chasing hammer, it was then formed using a wooden forming stake and a Delrin “dead-blow” cross-peen hammer to give it the anticlastic curves without removing the forging marks, allowing it to have even more ability to play with light and reflections as it’s worn.
I didn’t have any anticlastic stakes for forming this cuff, but thanks to a YouTube video by Torch Song, I made myself a couple of wood forming stakes that look like little Bullwinkle horns, and using one of them to form this cuff worked great. 😉
Making the wooden stakes is not at all difficult. All that’s really needed apart from a couple hours or so of free time is a hardwood board of adequate size, a ruler, a pencil compass, a drill with hole-saw attachments of various sizes, a regular hand saw, a half-round rasp and file (a “4-in-1” rasp/file combo would work well), and some sandpaper in course, medium and fine grits.
I used some scrap 1″x10″ oak board about 12″ long, and as I had the hole-saw attachments from past household jobs, including a hand-held router, drill and table saw at my disposal, the build was even easier for me as I was able to bypass a lot of the rasping, filing, sawing and sanding that you would need to do if you don’t have those tools.
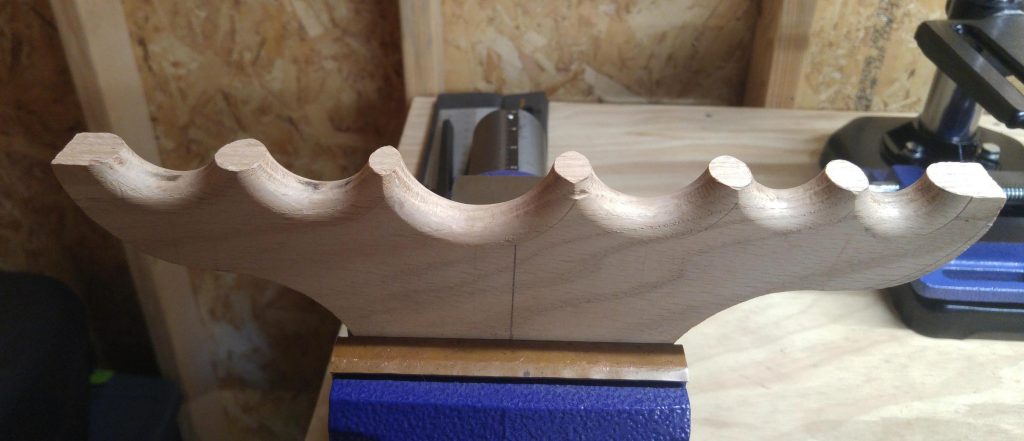
With the tools, supplies and the board in hand, draw a line down the center of the board’s length and evenly space centered circles of various diameters that you have hole-saw attachments for down the line, leaving plenty of space between the circles and the bottom of the board for support, as you’ll be banging metal on them and don’t want the stake to break there.
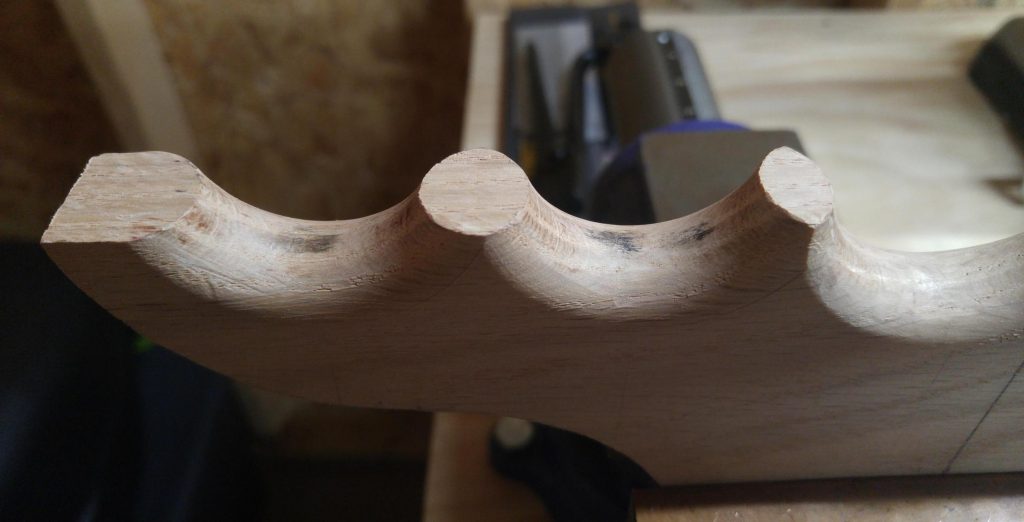
Using the hole-saws, drill out the circles, then cut the entire board in half lengthwise with a straight saw and you’ll have two identical halves with half-circles cut out down its length. Using the half-round rasp and file, round off the edges of the half-holes in the stakes, finish smoothing them out with the sandpaper and you’ve got yourself an anticlastic forming stake!
By securing one of the stakes in a vise and using the half-circle valleys in the anticlastic stake you can shape the cuff, which will take on the form of that valley’s rounded walls as well as start the bending of the metal into the circular cuff shape. Below is a close-up of the few valley’s in the stake I used to form this cuff…
You have to be careful to work the metal evenly though, so that the two ends of the cuff work to meet each other, otherwise you will wind up with a corkscrew shape with one end headed in one direction and the other end headed in the opposite direction.
If that problem seems too difficult for you to overcome when you first start forming anticlastic cuffs, you might try bending the flat metal (cut a little longer than you need for the cuff) around a regular bracelet mandrel and soldering the two ends together to make a closed bangle.
Then, slip the bangle over the end of the stake to the desired valley (you may need to trim the underside of the stake, depending on how wide of a board was used), and when you start forming the anticlastic curves you can be sure the ends will always meet because they already are! 😉
When you’re done with your anticlastic forming of the bangle, cut out the portion that includes the soldered seam for the open area of the cuff and very little tweaking should be needed to align the two ends perfectly. Or, leave it soldered closed and keep it as a bangle if it’s the right size!