
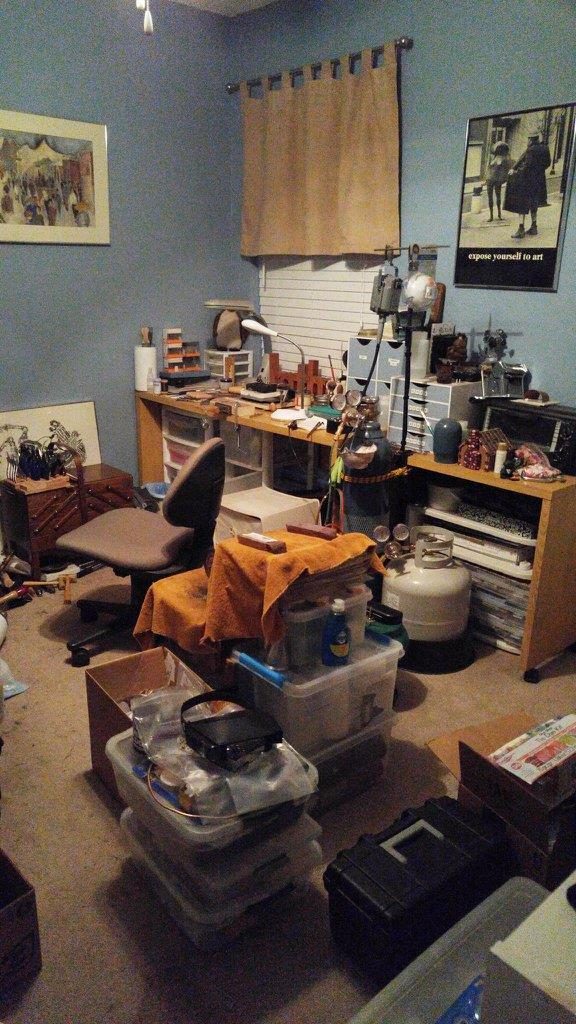
After almost a year after I started back with the hobby, the “I just need a little space” in Kathy’s craft room wound up being most of the room. And, with everything accumulating a super-fine layer of red polishing rouge, we decided I needed to move the operation out to a storage shed.
Below is what Kathy’s craft room became to look like before that move was made…
But, the storage shed didn’t even have a workbench yet, so we got busy that winter…
When my brother and I did our silversmithing back in the 70’s, we never had a fancy jeweler’s bench to work on, just an available work-desk in the stable’s office that we mounted the bench pin and polishing lathe onto when we were working there. By the way, that lathe, close to being worn out but still spinning, is hiding behind the rust-colored towel sitting on containers of tools and supplies in the first picture (Kathy’s craft room). The towel was used to at least alleviate *some* of the mess from polishing.
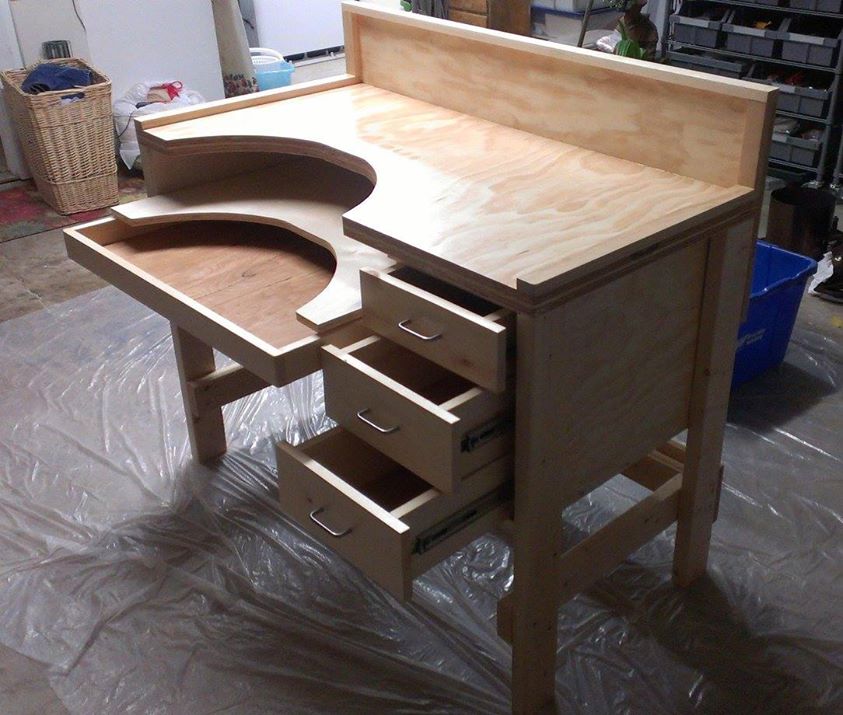
Since Kathy and I had done previous wood-working projects (wall-to-wall book shelves, and a king-size bed frame with head/foot-boards to name a couple), we figured that a workbench was in store. What started out to be a very simple jewelry workbench actually wound up morphing into a true jeweler’s bench. We picked up the lumber and parts as the build progressed, but don’t have more than perhaps $135 into it at this point (the most expensive parts were the drawer slides).
The basic plans actually came out of an old metalsmith book by Tim McCrieght, and it wasn’t until *after* the pieces for the drawer unit were cut that I realized the measurements in the plans for the drawers just would not equate to what was pictured in the book, but a little jury-rigging fixed that.
We also added things that were not part of the original plans in the book (a sliding catch-tray drawer, a sliding tool shelf right above that, and edging to the sides of the top surface to keep things from rolling off the bench onto the floor). In the end I think that the bench we built from scratch rivals some of the commercial benches I’ve seen out there costing several hundreds of dollars more. Having this bench to work on makes fabricating and repairing jewelry soooo much easier, and little customizations to it are still ongoing. 😀
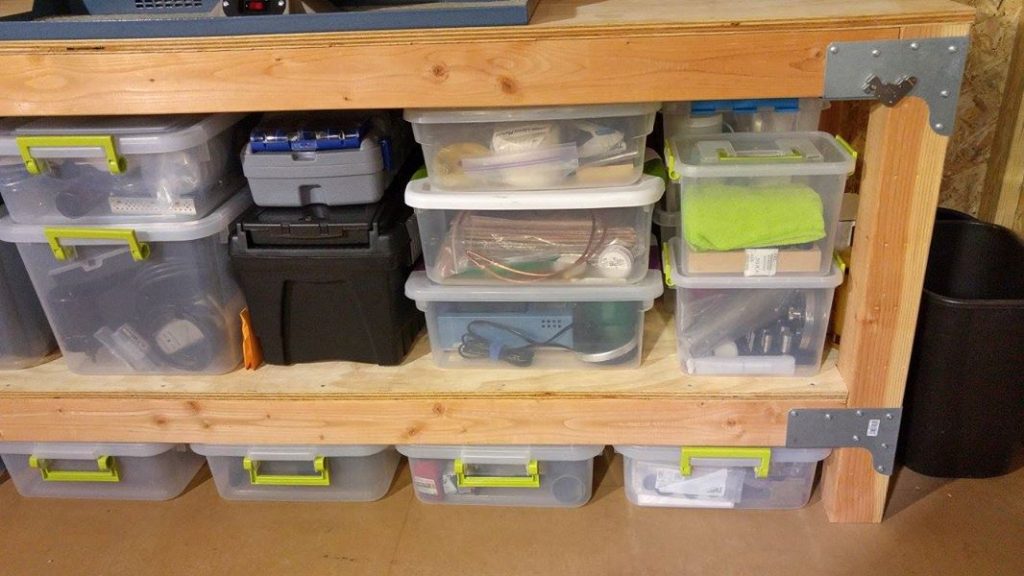
We also built just a regular workbench for the shed as well. Built with one 4×8 sheet of 3/4″ plywood cut in half length-wise, a couple 4×4’s and six 2×4’s all held together with screws and Simpson Strong-Ties, it’s super strong, and doesn’t budge an inch.
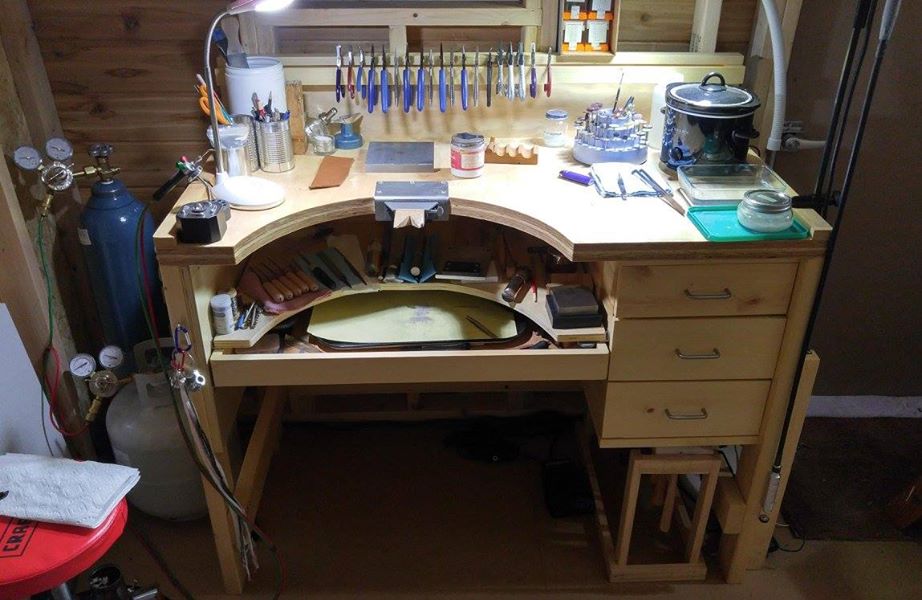
Here’s a shot of the jeweler’s bench set up in the shed. After the bench was first built, I’ve since added a wood strip on the top to rack my pliers on, and as a small rack that I built for my hammers long before the bench was even thought of happens to fit perfectly underneath the drawers, I plan to eventually rig drawer rails to it somehow, too, so that it will slide out. Right now the hammer rack just sits on the floor and I pull it out when I need to get to a particular hammer or mallet, and push it back under to keep it out of the way when I’m done.
With all my junk moved out of Kathy’s craft room, and everything including the walls cleaned of the fine layer of polishing rouge, she was finally able to get back to working on HER crafts for a change. 😉