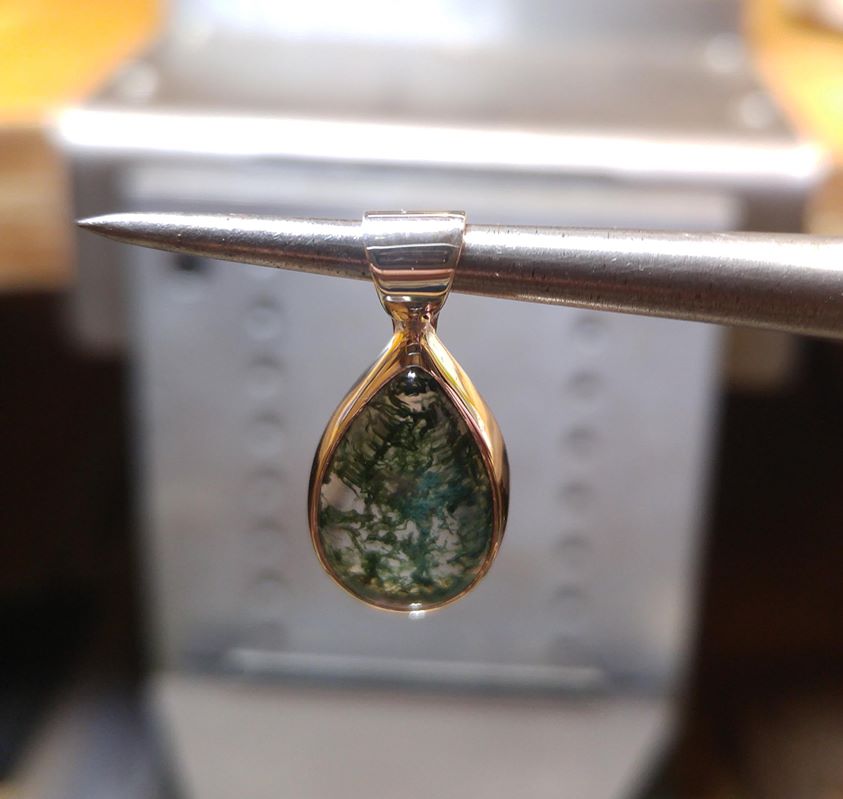
A sterling silver and green Moss Agate pendant made to go with matching earrings (see the next post Green Moss Agate Earrings for pics/info on those). The 15×10 mm pear-shaped stone is set in a backless step bezel which was made from 14 ga. square wire set inside 28 ga. sheet, and uses a simple fixed bale made in 24 ga. sheet.
I’m currently waiting on chain for the pendant to arrive. It will also be of flat drawn cable chain, but in a heavier gauge than the 1.3 mm chain used on the earrings. Once it arrives I’ll use 16″ of it and solder on a lobster clasp and O-ring sized for the chain.
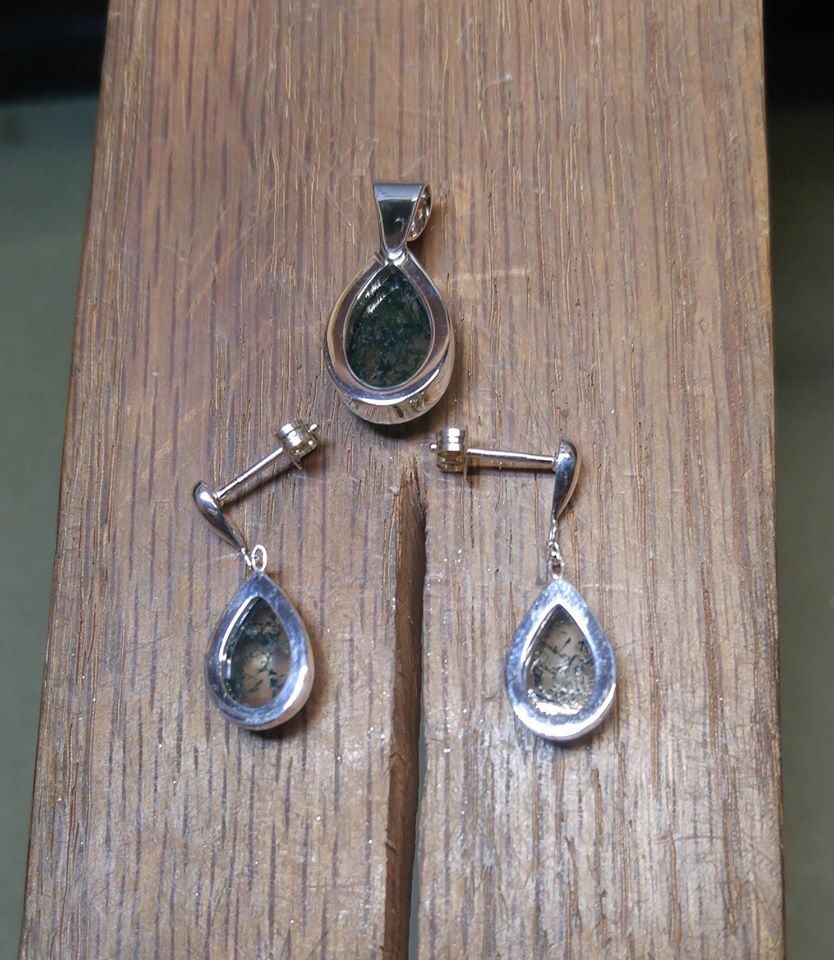
Here’s
a shot of the back of the pendant (and earrings) showing the backless
step bezels made to highlight the transparency and green mossy
inclusions of these beautiful stones.
Sterling silver and green Moss Agate pendant and earrings, back side showing stepped bezels
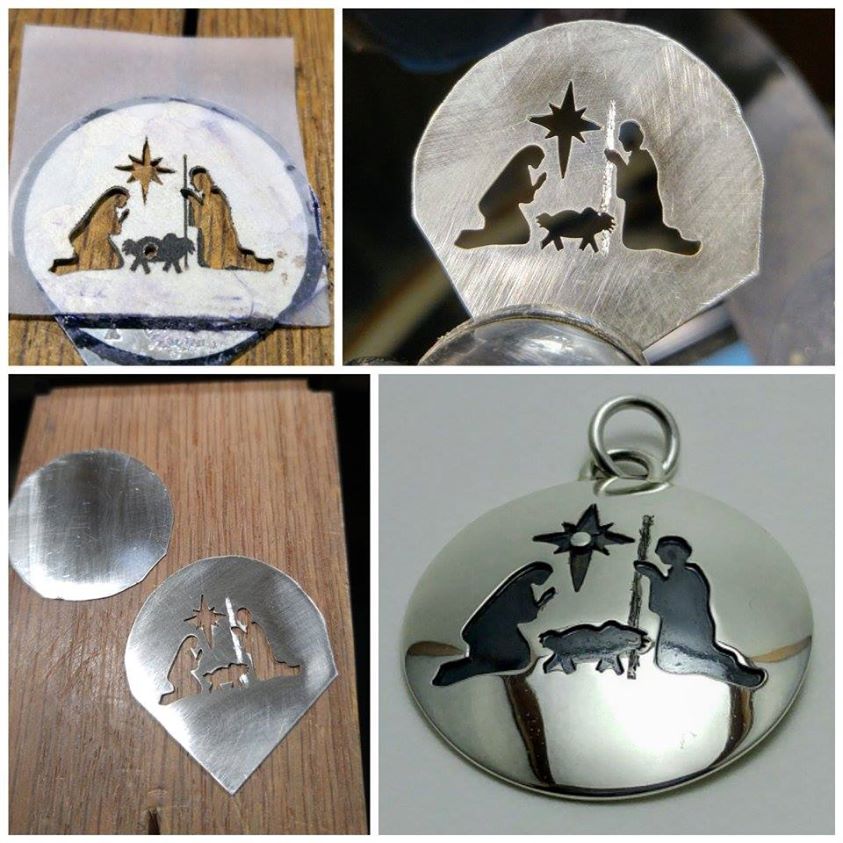
Sterling silver domed Nativity overlay pendant,with engraved Joseph staff
My wife Kathy just loves Nativity scenes (we’ve got several around the house) so when a free weekend came up, I decided to spend it in the shop and knock out a domed Nativity scene pendant for her.
I pierced the design in 24 ga. sheet with a jeweler’s saw using a 4/0 blade. I then used a hand graver to form Joseph’s staff to give it the appearance of wood, soldered the pierced overlay to the 26 ga. base, and followed that by giving it a domed shape on a dapping block. 16 ga. round wire was used to create the bale and O-ring before the piece went through the finishing, polishing, patina and final polishing stages. She loves it. 😀
Apologies for the reflections in the finished piece, as I am not a photographer and Kathy isn’t finished with her homemade light box setup for taking pictures of shiny surfaces. 😉
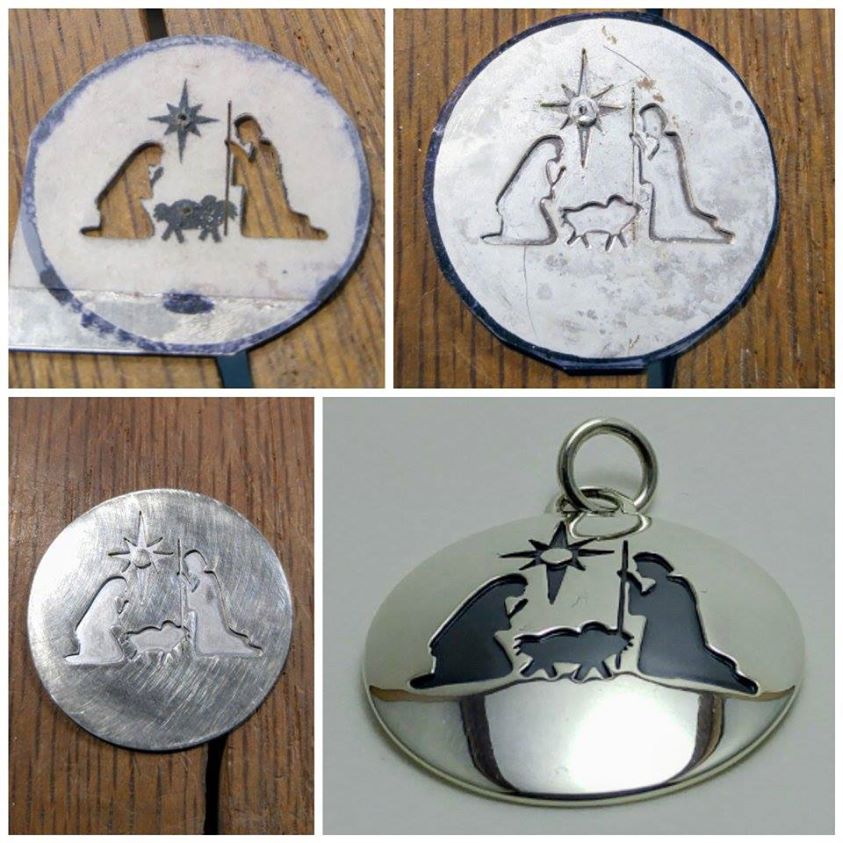
When I had TXT’d a picture of Kathy’s Nativity scene pendant to my brother and his wife saw it, she fell in love with it as well. Since I was waiting for some network build-out at work to be completed before I could move my DNS and SAN devices to the company’s new datacenter, I had the following weekend free as well and decided to knock out another pendant for her.
Sterling silver domed Nativity overlay pendant,with pierced Joseph staff
I used the same pattern and materials as with Kathy’s pendant, only I deviated slightly and pierced Joseph’s staff with a 4/0 saw blade instead of forming it with a graver. There are other slight differences as well (being hand-made), and I made the star slightly larger on this pendant.
And, if you read the text above for Kathy’s Nativity pendant, ditto on the apologies for the reflections in the finished piece. Oh, and my brother’s wife loves hers, too. 😉
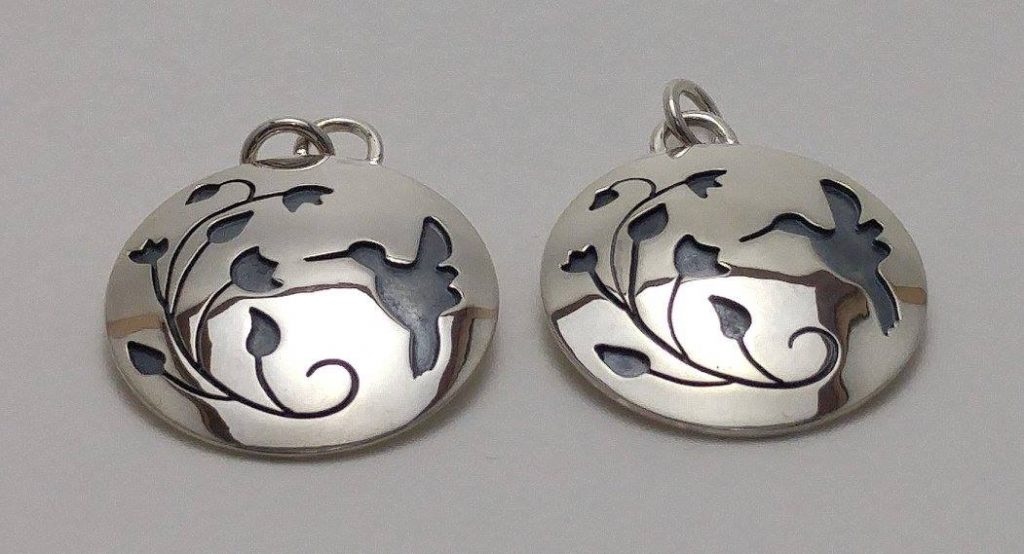
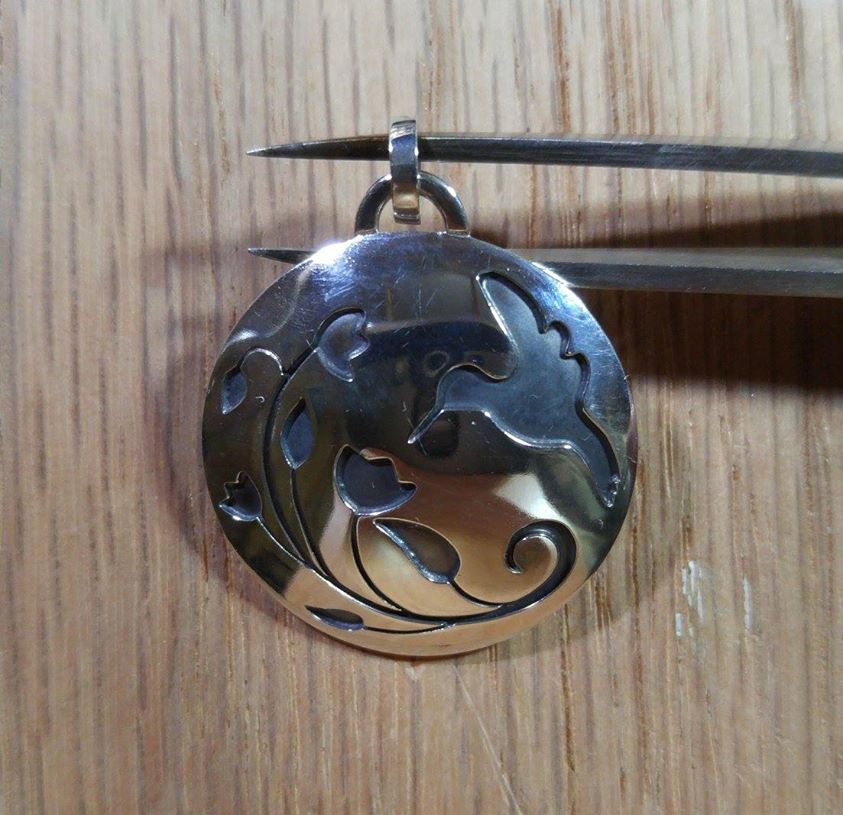
A pair of domed sterling silver overlay Hummingbird pendants, or possibly charms, that had been on my bench for months waiting for me to get around to finishing.
Made smaller than the Hummingbird I originally created in the past for my mother-in-law, these could be used as a small pendant, or even a charm on a bracelet (which is what one of them will be).
When a friend saw my first Hummingbird pendant, he wanted one for his mother, too. I told him I would be happy to make one for her, but he later mentioned that his mom had an allergy to silver. However, he said she could wear it on her charm bracelet, as she just couldn’t have it constantly resting against her skin, as with a pendant.
As the original Hummingbird pendant was really too large for a charm bracelet, I made these a little smaller, shrinking the design I created for the first pendant with a photocopier to the size I was wanting. I made two, in case I wasn’t happy with one of them, but they both turned out nicely.
I’m not sure which one my friend will choose for his mom, but whichever one isn’t claimed has already been spoken for by my wife (and how could I turn down my #1 customer?). 😉
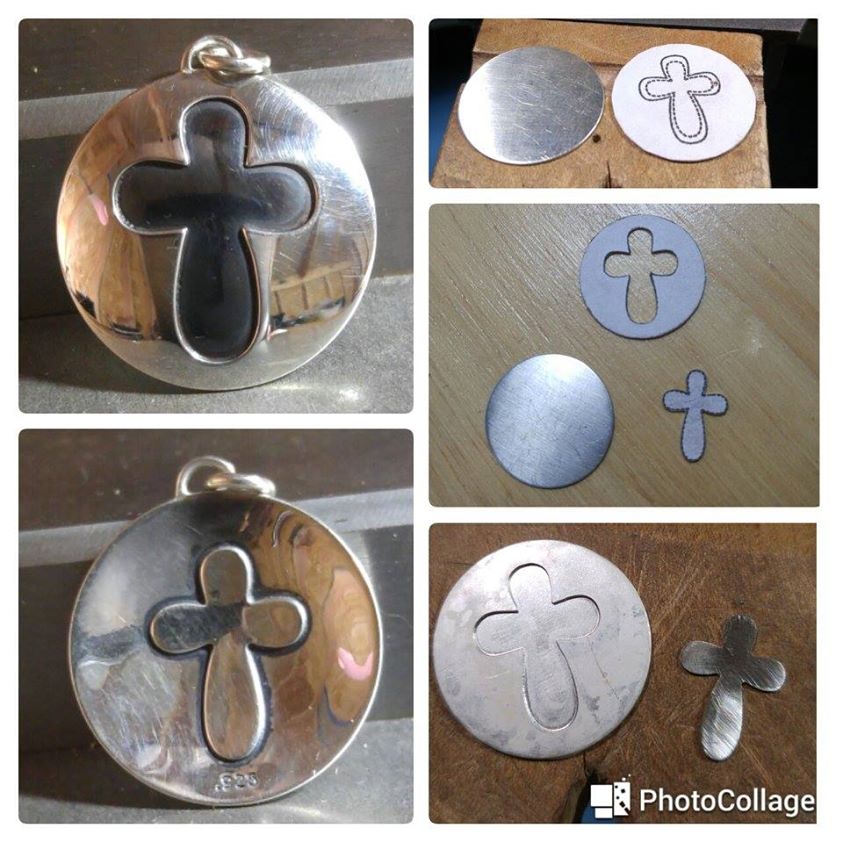
One of Kathy’s crafts is working with paper, creating greeting cards, albums, etc., and sometimes uses stamps by a maker named “Maymay Made It” in her work.
She loved one of the Cross stamps that came in one of Maymay’s sets, and wanted me to make a domed pendant with that style of cross on it, so what could be easier than using that very stamp on the pattern I use to pierce out the overlay piece?!
Sterling silver domed overlay Cross pendant
As the stamp has a “stitching” pattern on the interior, I drilled my starter hole between the stitching and outer lines. Then, after sawing out the cross, I cleaned it up along the stitch-lines and used that piece on the underside of the dome.
The oxidation turned out beautifully on this piece. Although it might not look like it in this photo, the patina from the liver of sulfur used in the overlay has a nice, consistent, dark gun metal gray from edge to edge.
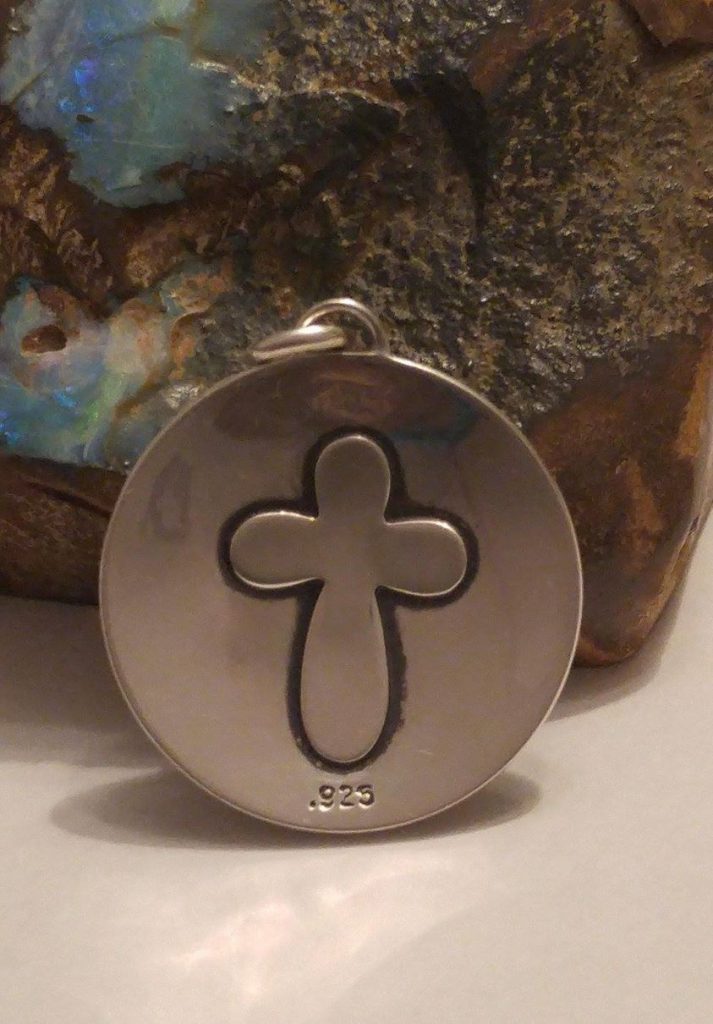
Sterling silver domed overlay Cross pendant, front
Above is frontal shot of the domed overlay Cross pendant in sterling silver.
And below is a shot of the back of the domed overlay Cross pendant showing the piece that was cut out of the overlay layer, domed, then soldered onto the back. 🙂
Here’s a set of forged cross pendant and earrings I made for Kathy back in 2014…
Forged sterling silver Cross pendant and earrings
Again, my photography is terribly poor, but they actually did turn out nicely. The pendant has the cross lay horizontally across the wearer’s breast plate.
By forging the sterling sheet with a ball-peen hammer on one side, and marking the patterns and sawing them out from the other side, you can create pieces that throw a lot of sparkle in the light. Solder on some O-rings to attach them to a chain or ear wires and you have a relatively easy project almost completed!
I did not make the ear wires however… she already had those factory-made ones on hand for her bead crafting, and the chain was purchased by the foot and only needed a clasp and O-ring soldered on after the pendant was attached.
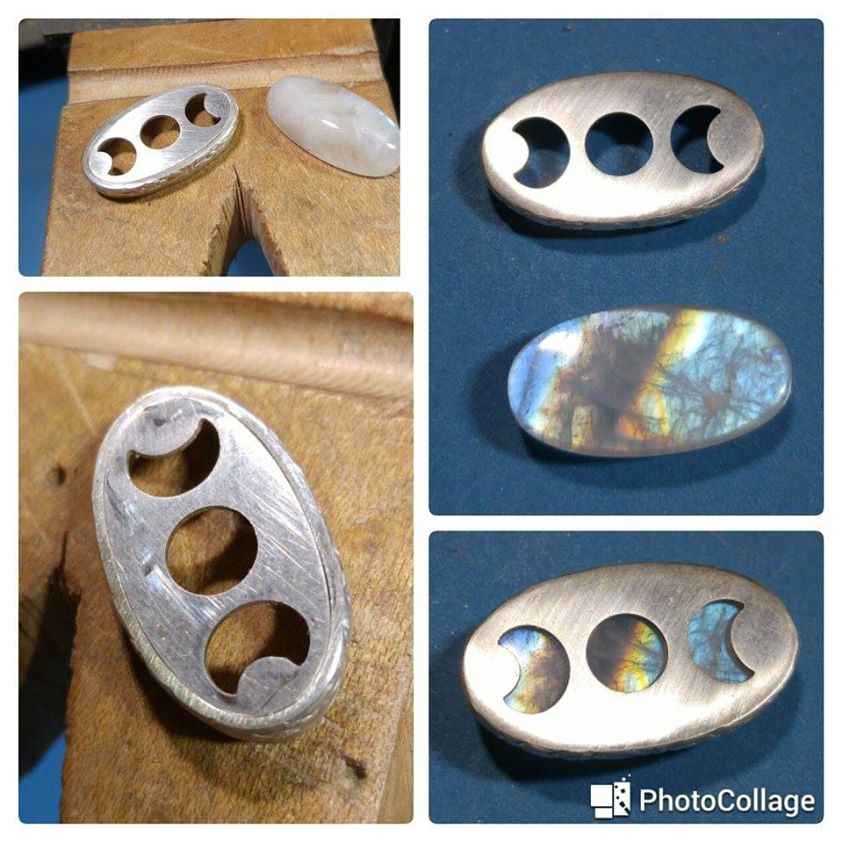
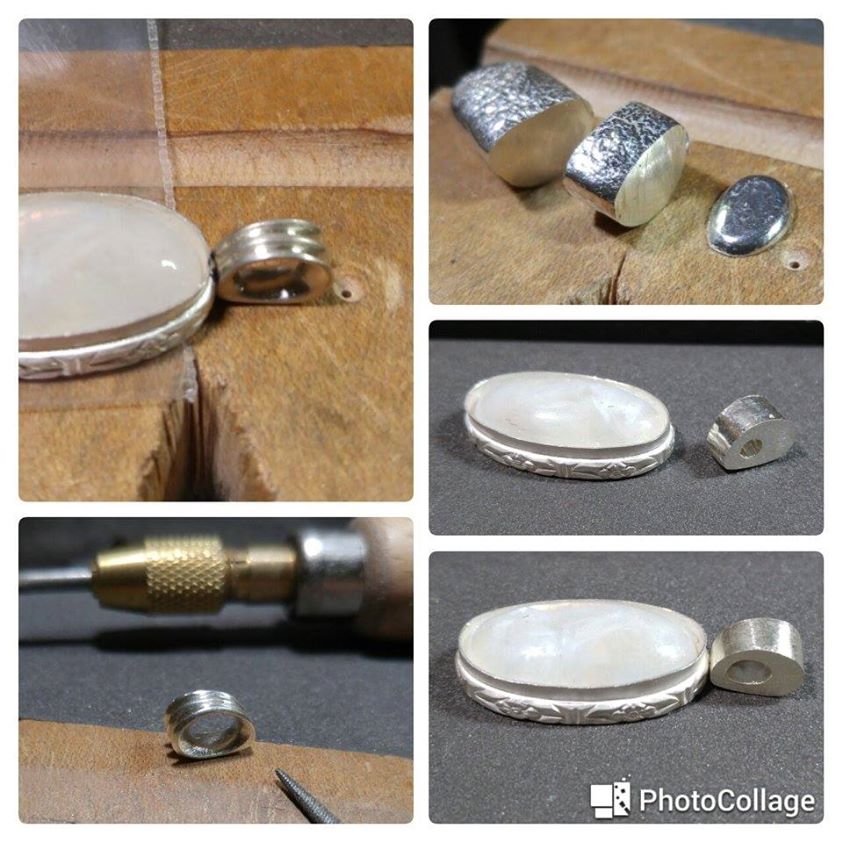
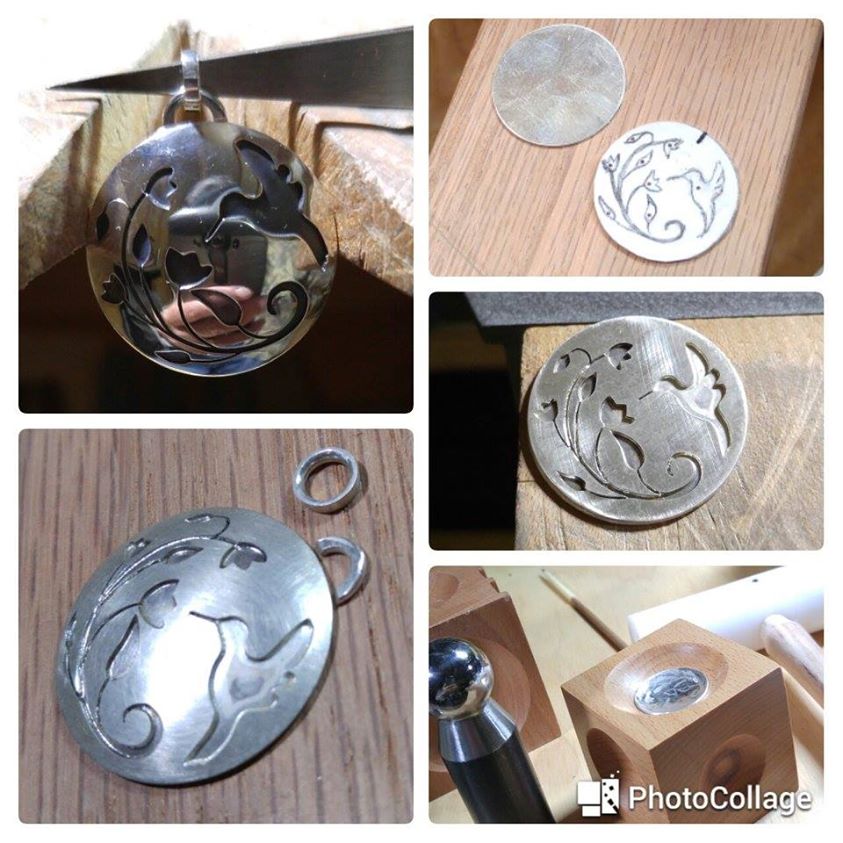
Here’s another collage of work-in-progress shots I took of another pendant I created for a co-worker to give to his wife (the same person that I created the sterling silver Om overlay pendant and stacker ring for)…
Sterling silver Moonstone Moon Phase pendant, pierced base
He had given me a ring they had bought in Mexico that had been stamped with “.925” (indicating it was sterling silver), but in reality turned out to be plated brass, which even had the plating wearing away in spots, and a nickel silver bezel for the stone (none of which is real silver, and very illegal to sell as such, even in Mexico). Buyers beware, not everything for sell by beach walkers in Mexico is authentic!
They knew the metal wasn’t worth saving (I returned it to them for recycling anyway), but were wanting me to create a pendant or something with the stone, since at least that was real, and had a pretty flash. So, I figured I would take on the assignment and see what I could come up with.
The stone was a beautiful Rainbow Moonstone. When I removed it from its cheap bezel I found that the bottom of the stone was polished as well (likely from having been tumble-polished), but had just as much, if not more, flash as the top and I wanted to do something to show that off, too.
I had received some really pretty pattern wire in from Rio Grande and decided it would make for a great bezel border, so made a base pierced with moon phases (appropriate for a Moonstone belonging to someone that’s into meditative crystals and such, right?!), and inset it into the bezel and border. The pictures show the tight fit before soldering, as well as after the soldering and sanding cleanup.
The next step was to create a bale for the pendant. After giving it some thought, I chose to use a piece cut out of a small ingot I had poured, then drilled and filed it to shape, giving it three ridges with two valleys.
Sterling silver Moonstone Moon Phase pendant, creating the bail
These above shots show the ingot slice I used, and the bale after the drilling, rough and final shaping were done, and then fitting it to the pendant for a clean solder-job to come next.
You can also see a bit of the pattern wire design I chose for the border, though it really doesn’t “pop” until the piece is finished, oxidized, and the stone set and final polish done.
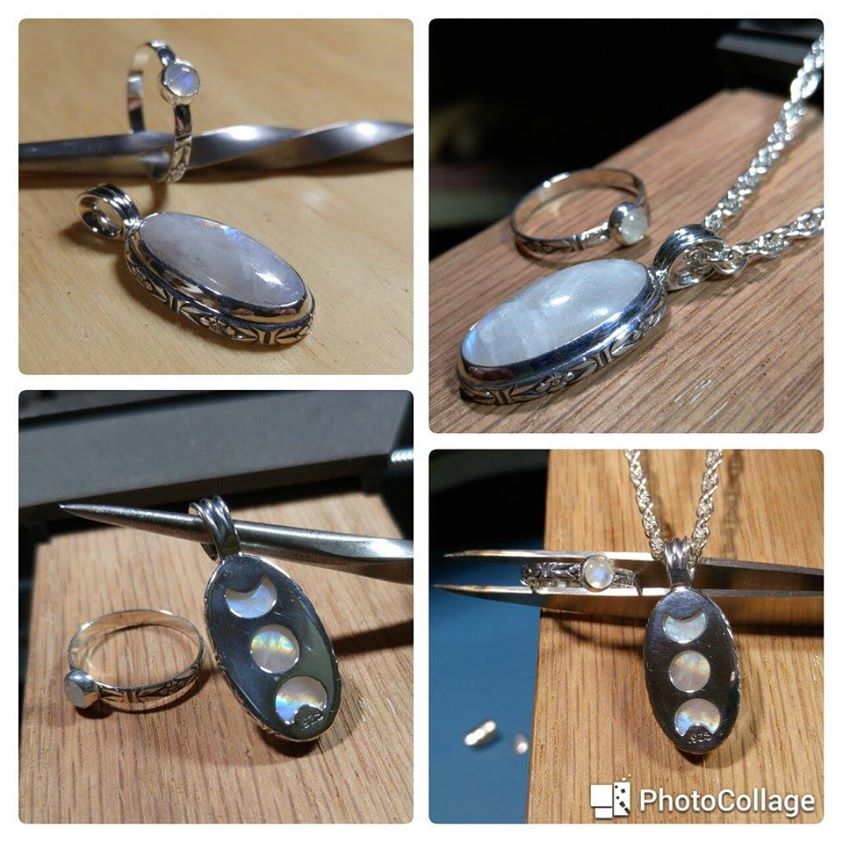
Below is another collage showing the finished piece. I wish my photography skills were better, but the piece turned out very well and has probably received the most “likes” on Instagram that I have had on any of my postings there to date.
Sterling silver Moonstone Moon Phase pendant and Moonstone stacker ring, top and bottom views
As the pattern wire was just about right for a light-weight stacker ring, and since the last pendant I had made for the co-worker to give to his wife included a stacker ring, I decided to do the same and even had a little 5mm Rainbow Moonstone to use on it, which makes for a perfect match to the pendant since they use the same type of stone and pattern wire.
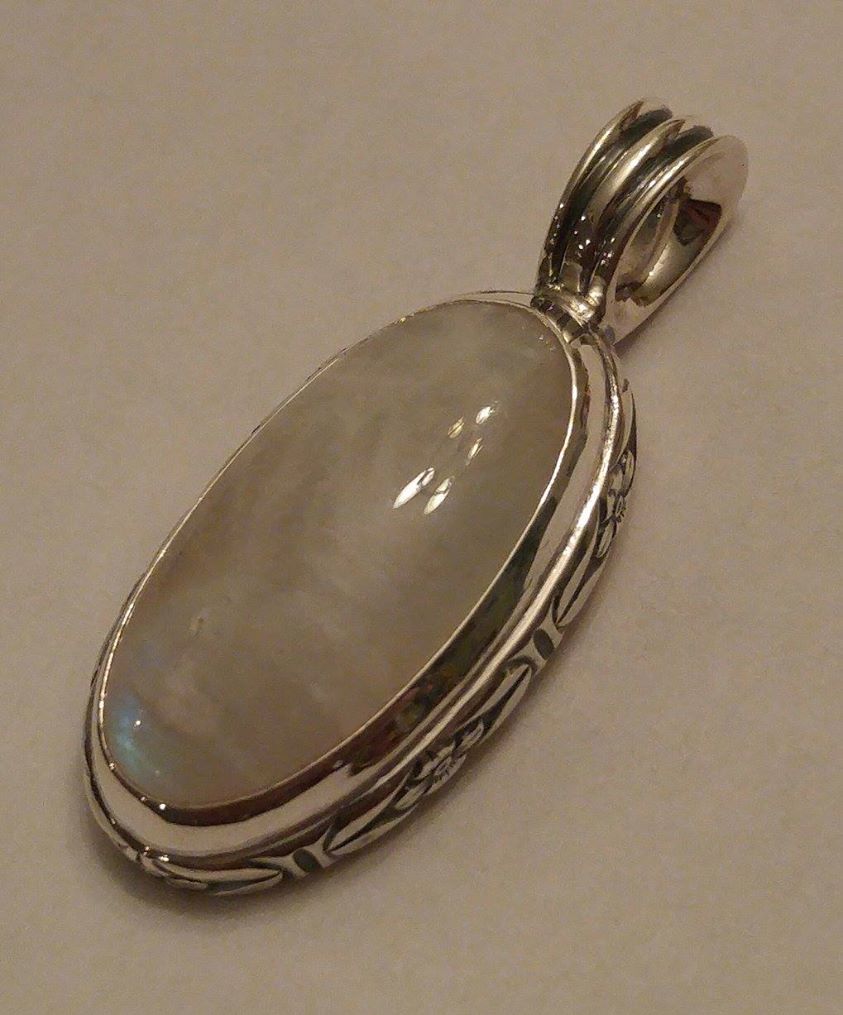
Sterling silver Moonstone Moon Phase pendant, closer view of bezel
Not the best lighting by far (especially for showing off the moonstone’s flash), but above is a closer frontal shot of the completed Rainbow Moonstone pendant that the work-in-progress collage pictures covered.
A sterling silver domed overlay Hummingbird pendant I created for my mother-in-law. The disc started out just barely over 1″ in diameter (I traced the outline from one of my dog’s old tags I had laying around), and pierced the overlay using a 6/0 saw blade.
Above is another collage picture of the Hummingbird overlay pendant showing work-in-progress stages with the pattern glued onto the overlay piece, the top pierced piece and base layer sweat-soldered together, doming on the dapping block, the bale and jump ring ready to be soldered on, and the finished piece after oxidizing and final polishing.
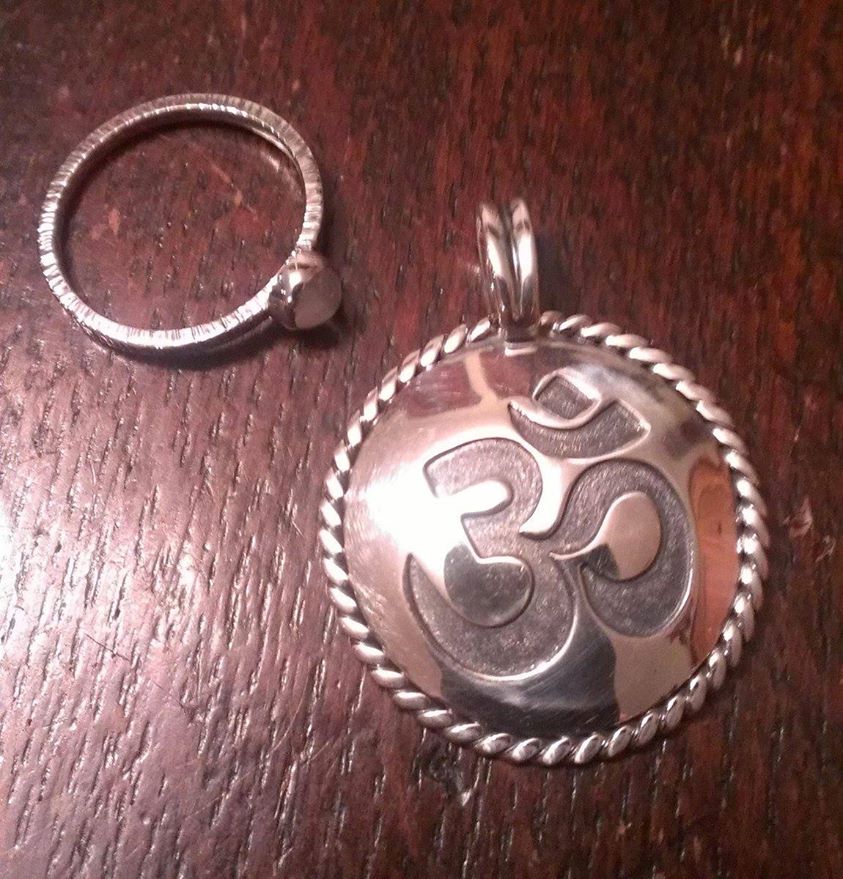
A sterling silver Om overlay pendant and Moonstone stacker ring I created for a co-worker to give to his wife as an anniversary present.
Sterling silver Om overlay pendant with Moonstone stacker ring
The bale was formed from half-round wired shaped and filed to give it a slight “valley” down the center, with a border of twisted rope wire. The base of the overlay was textured with a diamond bit after being soldered onto the top pierced layer, which adds a bit of dimension to the patina given by the liver of sulfur.
Ironically, the ring came about as the square-wire band was textured on three sides with a cross-peen hammer, and had actually been soldered onto the edge of the pendant as a border element. But, I didn’t like the way it looked and wound up cutting it back off, and went with the twisted rope border instead. Not wanting to allow the textured wire to entirely go to waste though, I cleaned it back up a bit and created the Moonstone stacker ring band with some of it instead. 😀
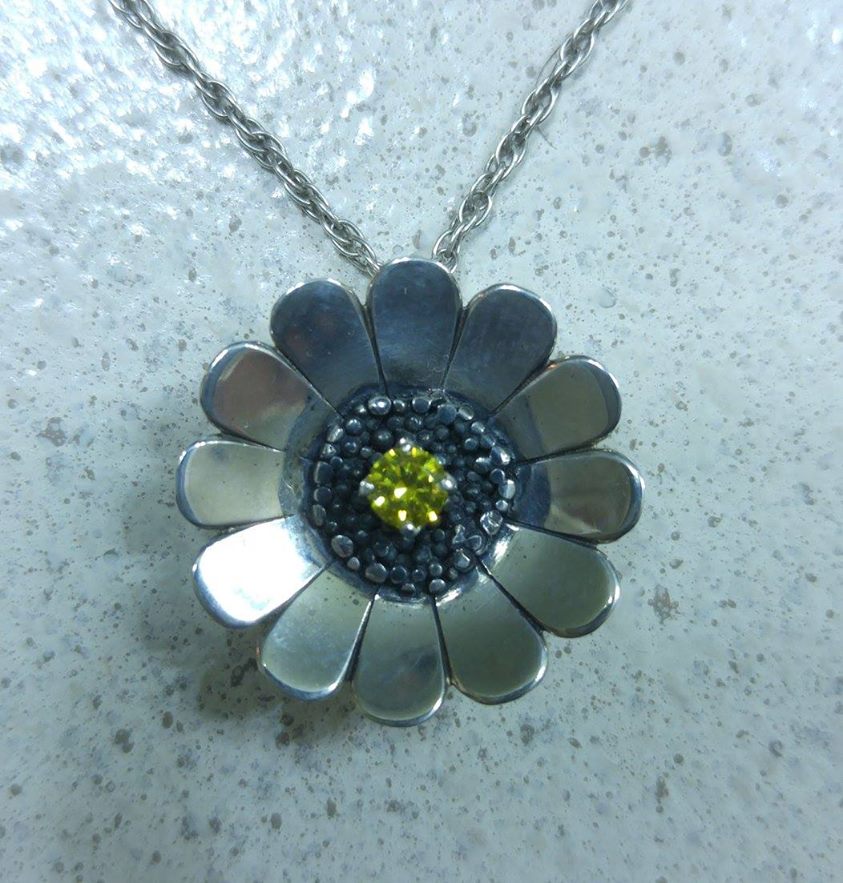
A multi-layer Sunflower Pendant from 2014 having a granulated center (I wasn’t at all happy with how THAT turned out) around a faceted 5 mm yellow Cubic Zirconia set in a crown prong setting. All components were fabricated separately from sheet or wire.
Sterling silver Sunflower pendant with yellow CZ, front
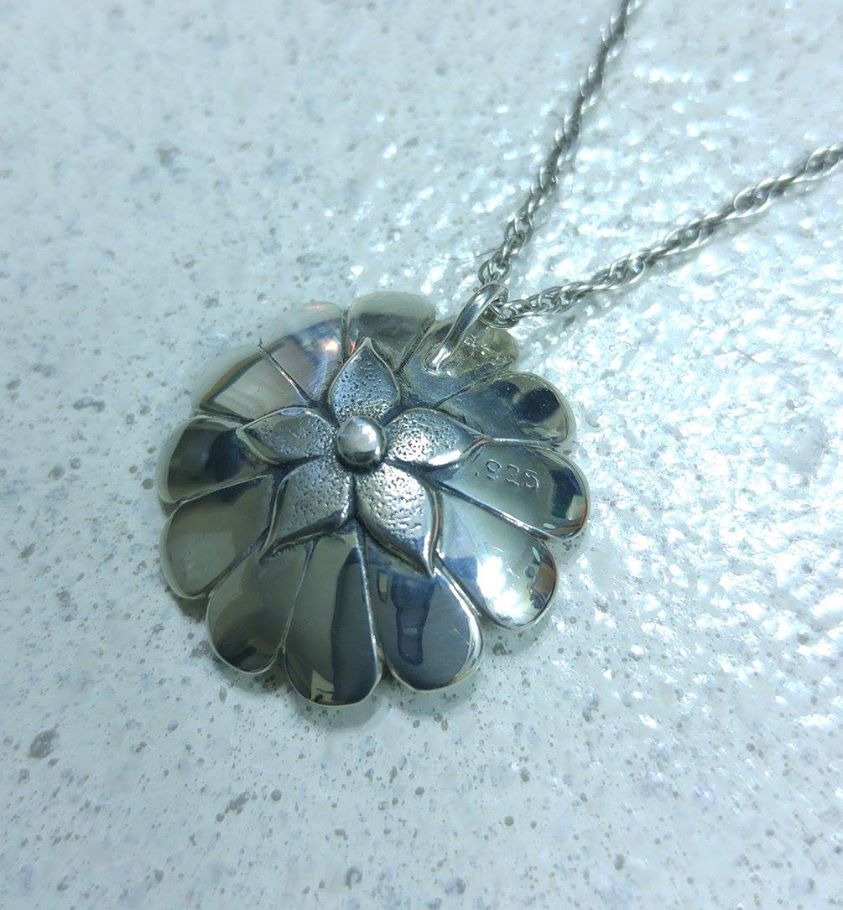
The backside of the Sunflower pendant turned out great though. The sepal was textured with sandpaper and a hammer, and the stem was cut from a few millimeters of wire and textured with striations to give it a realistic appearance. The sepal and stem were then domed and soldered to the back of the flower (also domed), and a bale of round wire invisible from the front accepts the chain.
Sterling silver Sunflower pendant with yellow CZ, front
The granules and prong elements on the front of the flower were soldered on last while the flower rested in a depression on the charcoal block. And, I know now what I should have done to get the granules properly fused to the flower (and I should have made them smaller, too), but my wife loves this “prototype” just as it is, so it was saved from getting tossed into the scrap bucket and the stone was set. 😉
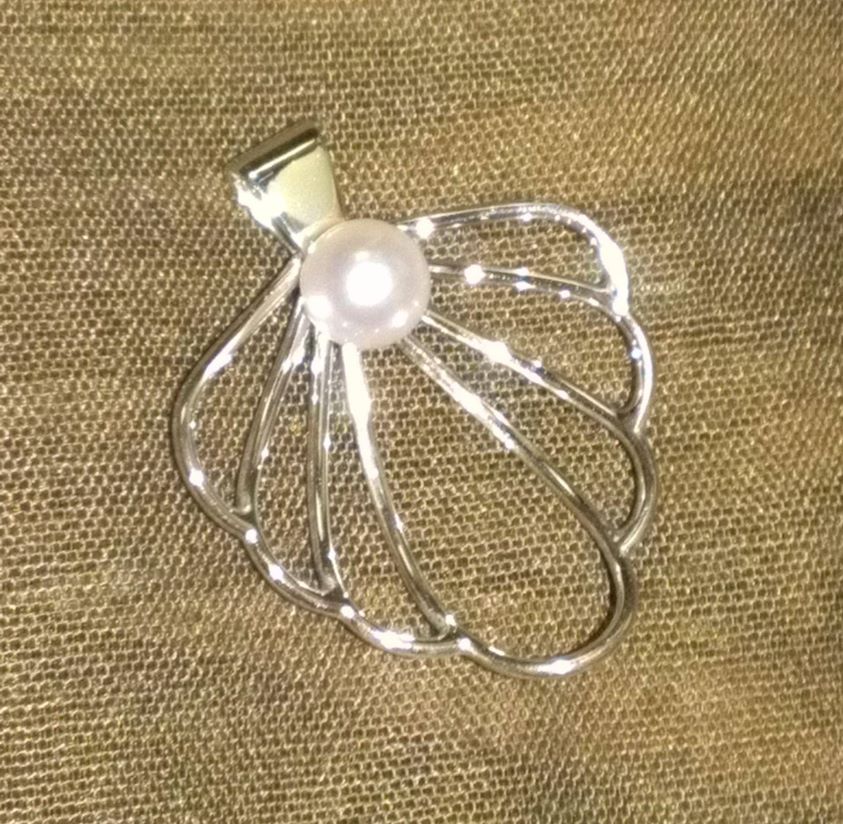
Below is a picture of a simple wire-form shell pendant I created with a natural pearl set in the center, and is another one of my early 2014 projects. It came straight from one of Soham Harrison’s YouTube videos (thank you Soham!!), though I deviated on the bale… I think mine makes for a better fit with the style. 😉
Sterling silver wire-form shell with pearl
I’ve picked up a LOT of great information from online videos and magazines (YouTube and Vimeo are virtual goldmines). Aside from what I had learned looking over my brother’s shoulder when he got back from his beginning silversmithing courses in Roswell, NM back in the 70’s, everything else was more or less self-taught from a few books.
With the addition of online videos and modern magazines and books that are available now, my knowledge and skills in metalsmithing have increased dramatically.