
I know that I had mentioned in my last post that I planned on re-cutting the Beginner Honeycomb design in Santa Ana Madeira Citrine (and still plan to!), but I had been wanting to facet an Emerald Cut design for a while now and had a design that I thought would be a great match with that stone called Golden Steps, a design by Greg Glenn.
Santa Ana Madeira Citrine is sourced out of Brazil, and is prized for its darker honey-orange-red color named after a fortified Portuguese wine made in the Madeira Islands, and less than 2% of Citrine comes in this color. Brazil is a great source for a lot of various quartz material, from Amethyst, Citrine and Ametrine (which has both of those colors together in the same crystal), to Prasiolite (a sea green color), Lavender, Rose, Lemon and a host of other types of quartz.
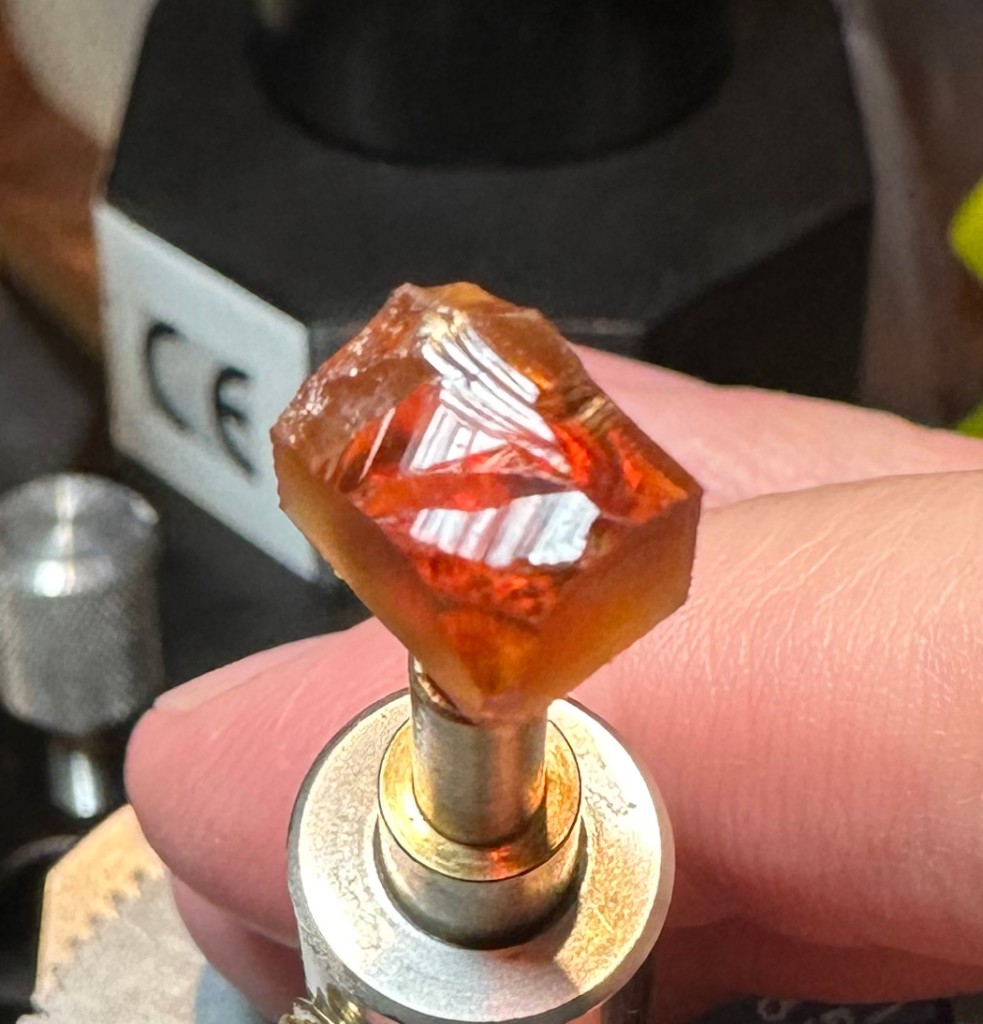
I should have taken a pic of the rough piece before I started working on it, but here it is shortly after I got the sides basically formed, and I think you can see that a gem faceted in this material will look great in practically any design that is chosen.
Emerald Cut designs are usually not too difficult to facet, and were really used to maximize an Emerald’s weight. Since most Emeralds, due to their crystal structure often naturally taking the form of a hexagonal block, rectangular or square cuts are very common for those stones as there is no set width or length that needs to be used for the design, which makes it easy to fit the design to the stone.
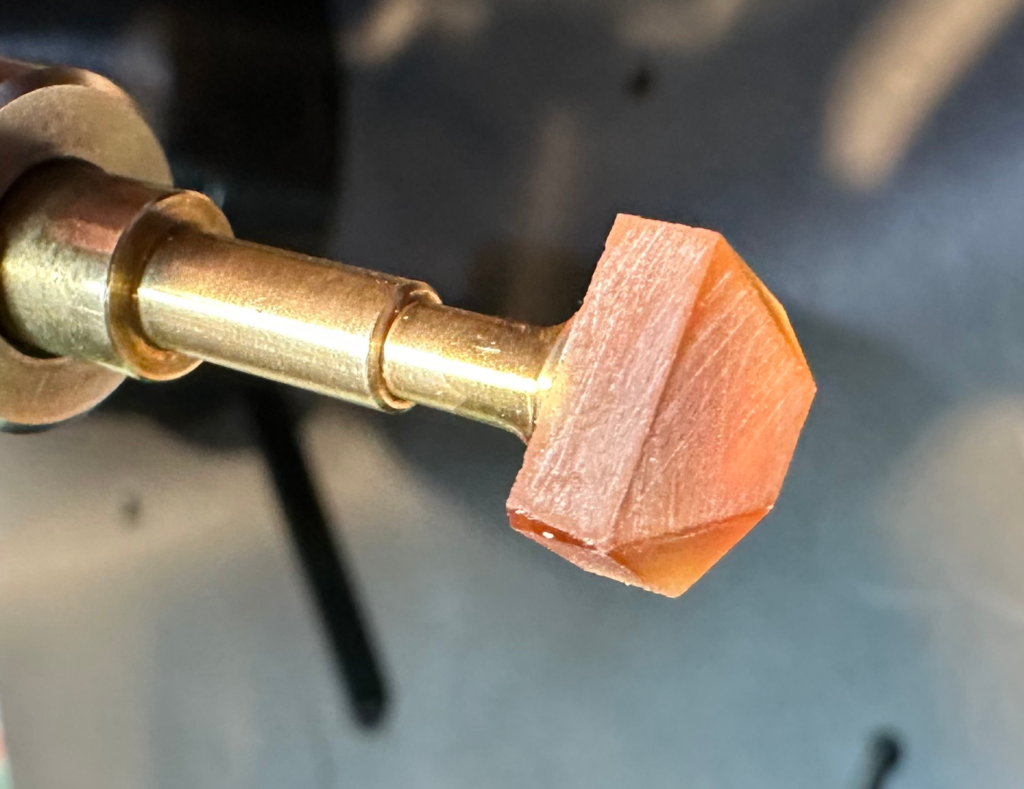
Here is a shot taken of the stone after having its girdle and pavilion roughed in on a 320-grit “topper” lap (cheaper imported thin metal laps placed on a much thicker “master” lap base). The shape at this point doesn’t need to have corners meet, as the corners will be faceted, too. The next step after this is changing out the lap with a 1,200-grit lap to get rid of the scratches the 320-grit lap left behind.
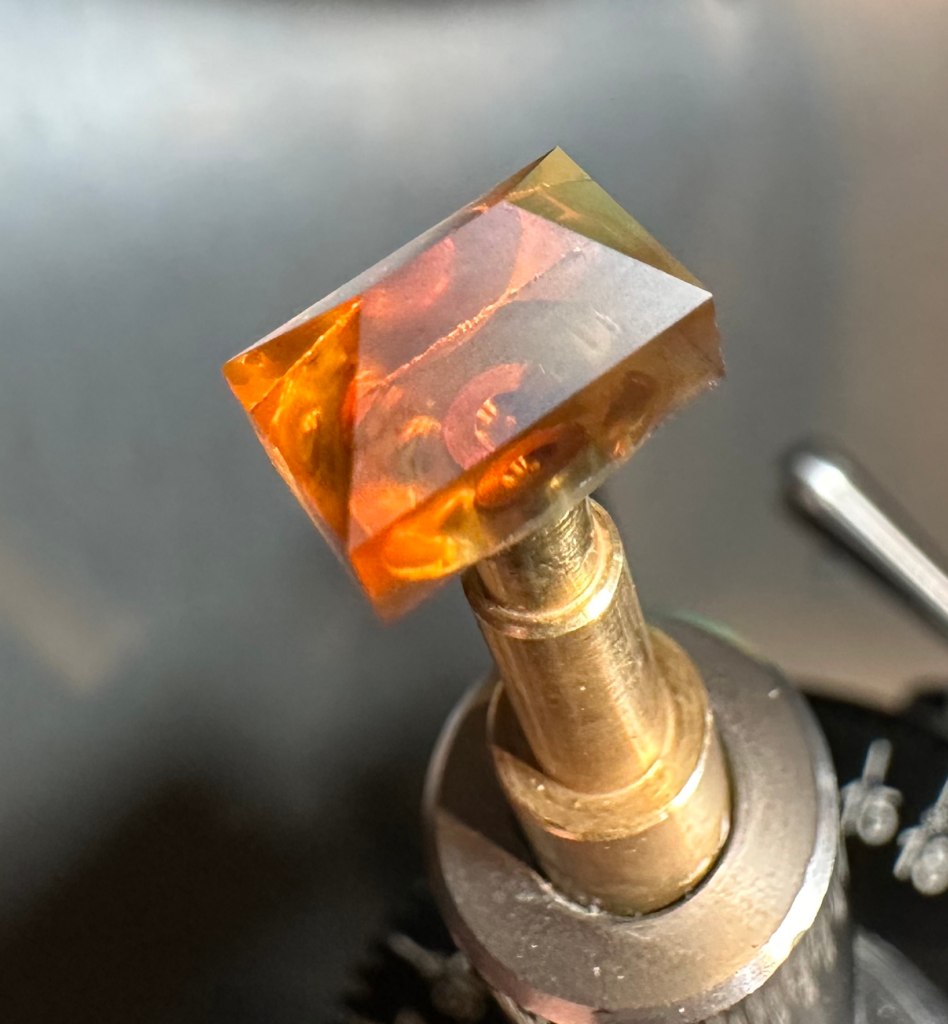
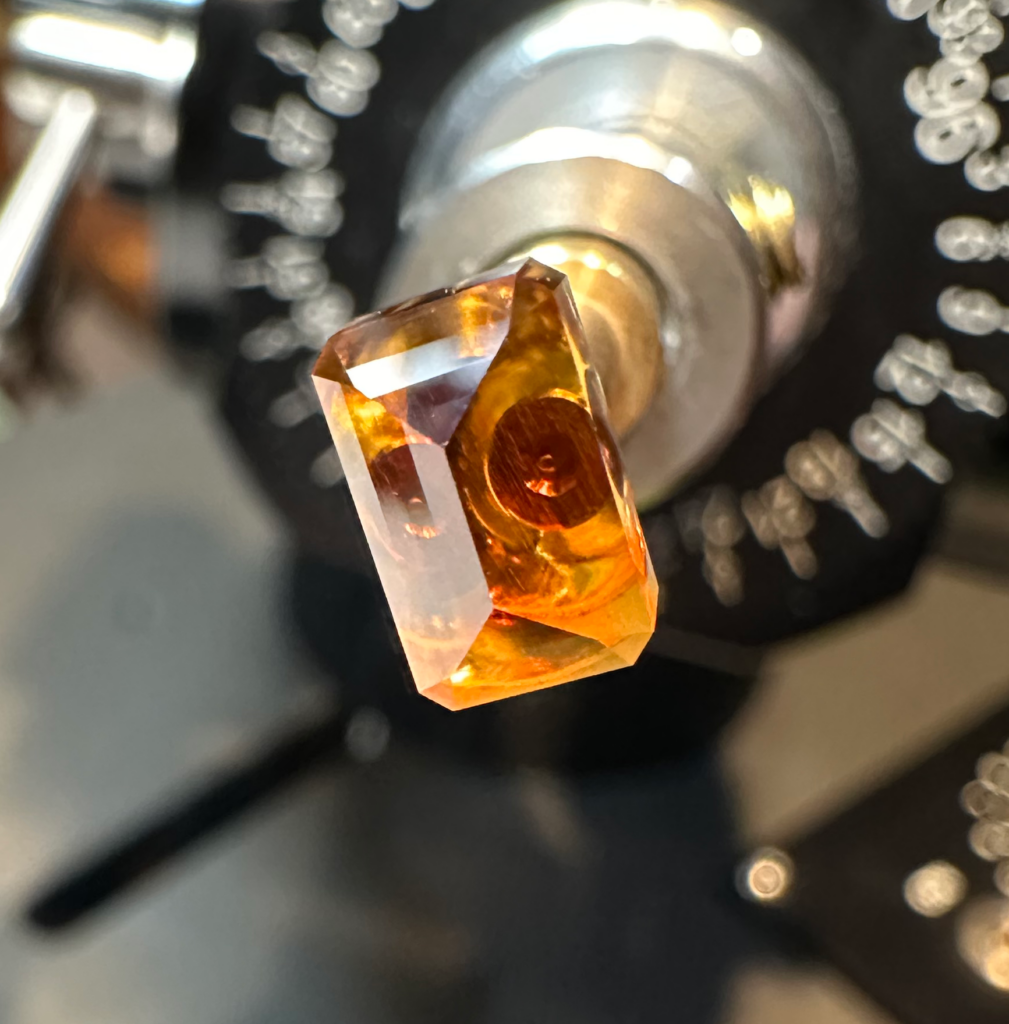
After taking it from there onto a 3,000 grit resin-bonded pre-polishing lap, and with the stone’s pavilion shaped in, it almost looks like a little Monopoly game piece. It’s at this point that you can see the crystal’s interior color zoning, where a “misty cloud” of darker orange color seems to be floating in a sea of lighter Citrine quartz. Seeing these in gems and imagining the formation of the crystal as it occurred in nature eons ago never ceases to amaze me.
The rectangular and square cuts are so commonly used with Emeralds that these designs became known as “Emerald Cuts”, with step-cut facets on the crown coming together with a rectangular or square table, and step-cut facets on the pavilion forming a keel. As natural Emeralds almost always have inclusions and often lack clarity, the pavilion wasn’t formed to maximize light reflection as much as to just complement the crown and retain weight.
However, these cuts look great on other stones, too, even those with higher clarity and are very popular with other varieties of Beryls such as Aquamarine and Heliodor, as well as Tourmaline, Amethyst or just about any gem, really. This is especially true if the gem is dark in color or semi-transparent since the pavilion’s cut usually isn’t made to maximize the light reflected back up through the crown.
Out of my natural rough, I had two pieces that I thought were the perfect form for an Emerald Cut, one being a piece of Arizona Peridot, and the other being the Santa Ana Madeira Citrine I cut this gem from. You don’t need to have a block form to cut an Emerald Cut, but to minimize the loss of stone if you have one, an Emerald Cut in one of the many designs out there of that type is a good choice.
However, as things sometimes go, a small chip came off one of the end girdle facets, right at the corner that required me to bring the girdle in, so I had to go back down to my 1,200-grit lap to take that out, then bring in the opposite girdle by the same amount before getting back to the 3,000-grit pre-polish lap.
As the pavilion’s tiers, or steps (which only increment by 2° for each step) and the corners don’t take much at all to facet or cut, I then progressed to my copper lap charged with 14,000-grit diamond powder and polished those facets in. Although 3,000-grit is considered a pre-polish grit, 14,000-grit really is, too, but can be more precise when bringing in meet-points or facets that only take a very light touch to get into place on smaller stones.
I polish the stones after that using a lap with one of the polishing oxides (cerium or aluminum), or 60,000-grit diamond powder, depending on the material being polished. With some stones (such as quartz), I can often go straight to polishing after using the 3,000-grit lap. But, as the pavilion facets on this stone might be cut too quickly or aggressively with the 3,000-grit lap, I opted to take it a bit slower and use the 14,000-grit lap to bring them in, and then polished.
With the pavilion completed the gem is now ready to transfer to another dop and have the crown completed. There is a HUGE amount of stone left for the crown (more than I thought there would be, though not helped by having to reduce the girdle), and with experience if there is a better design for a particular stone’s shape I might be able to save more weight, but I had already committed myself to this design.
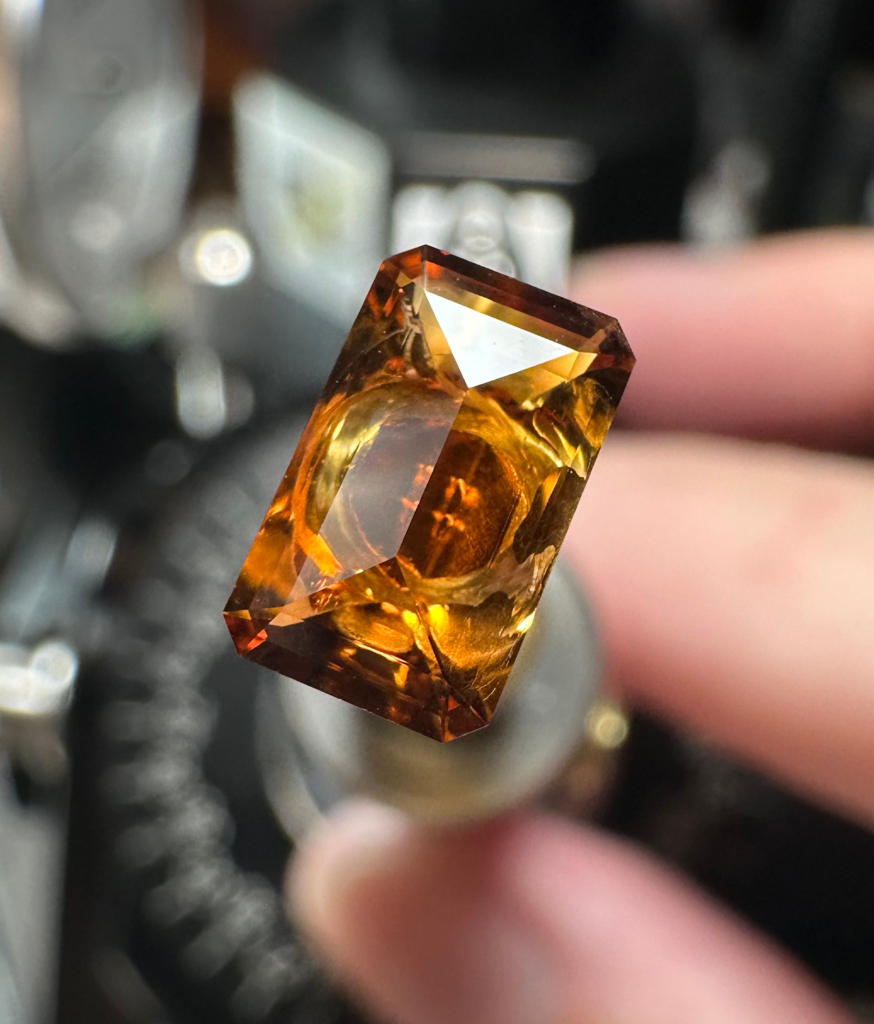
With the gem transferred to another dop so the crown could be cut, things started taking shape and the beautiful color of the Santa Ana Madeira Citrine stone really is something. I hated to grind most of that top block off as it drastically reduced the weight of the stone, but sometimes it just can’t be helped, especially when someone like me lacks experience.
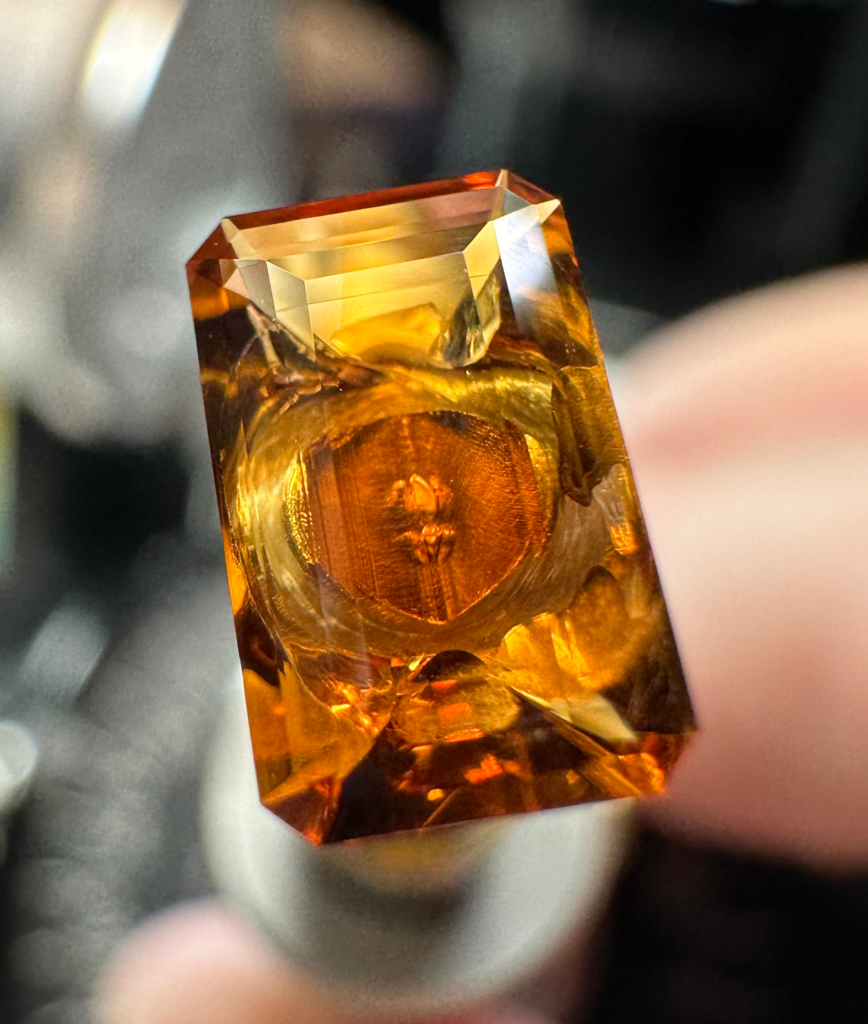
Here, I have all the crown facets cut and polished with the exception of the table. The reason for that is because tables are cut using a 45° “table adapter” that is provided with the faceting machine, as aligning the faceting machine’s spindle perpendicular to the lap could be dangerous to both the machine (since there’s no angle, all force would go straight to the mast and could damage it) and the stone, should the stone bind on the lap and shatter.
Also, with mast-type faceting machines which have the index gear and spindle mounted on a mast or pole, once you have aligned the stone in the spindle to the index gear, removing it and then re-attaching it makes it even more difficult to match angles that have already been cut, or still need to be cut, and may require the use of the micro-adjuster (aka “cheater”) to work slight adjustments into the angles on possibly every facet, which greatly adds to the complexity in faceting a stone.
Barring a stone falling off the dop, you really only want to remove the dop from your spindle three times when cutting a stone if at all possible… once when you have completed the pavilion and need to transfer the stone to a new dop, again when you remove the dop after polishing the crown facets and attaching the table adapter to cut the table, and lastly when the table has been cut and polished, as at that point the gem is completely faceted (for those that cut pavilions first that is… there are some faceters that cut the table and crown first and the pavilion last, but they usually use alternative faceting devices than a mast-type faceting machine).
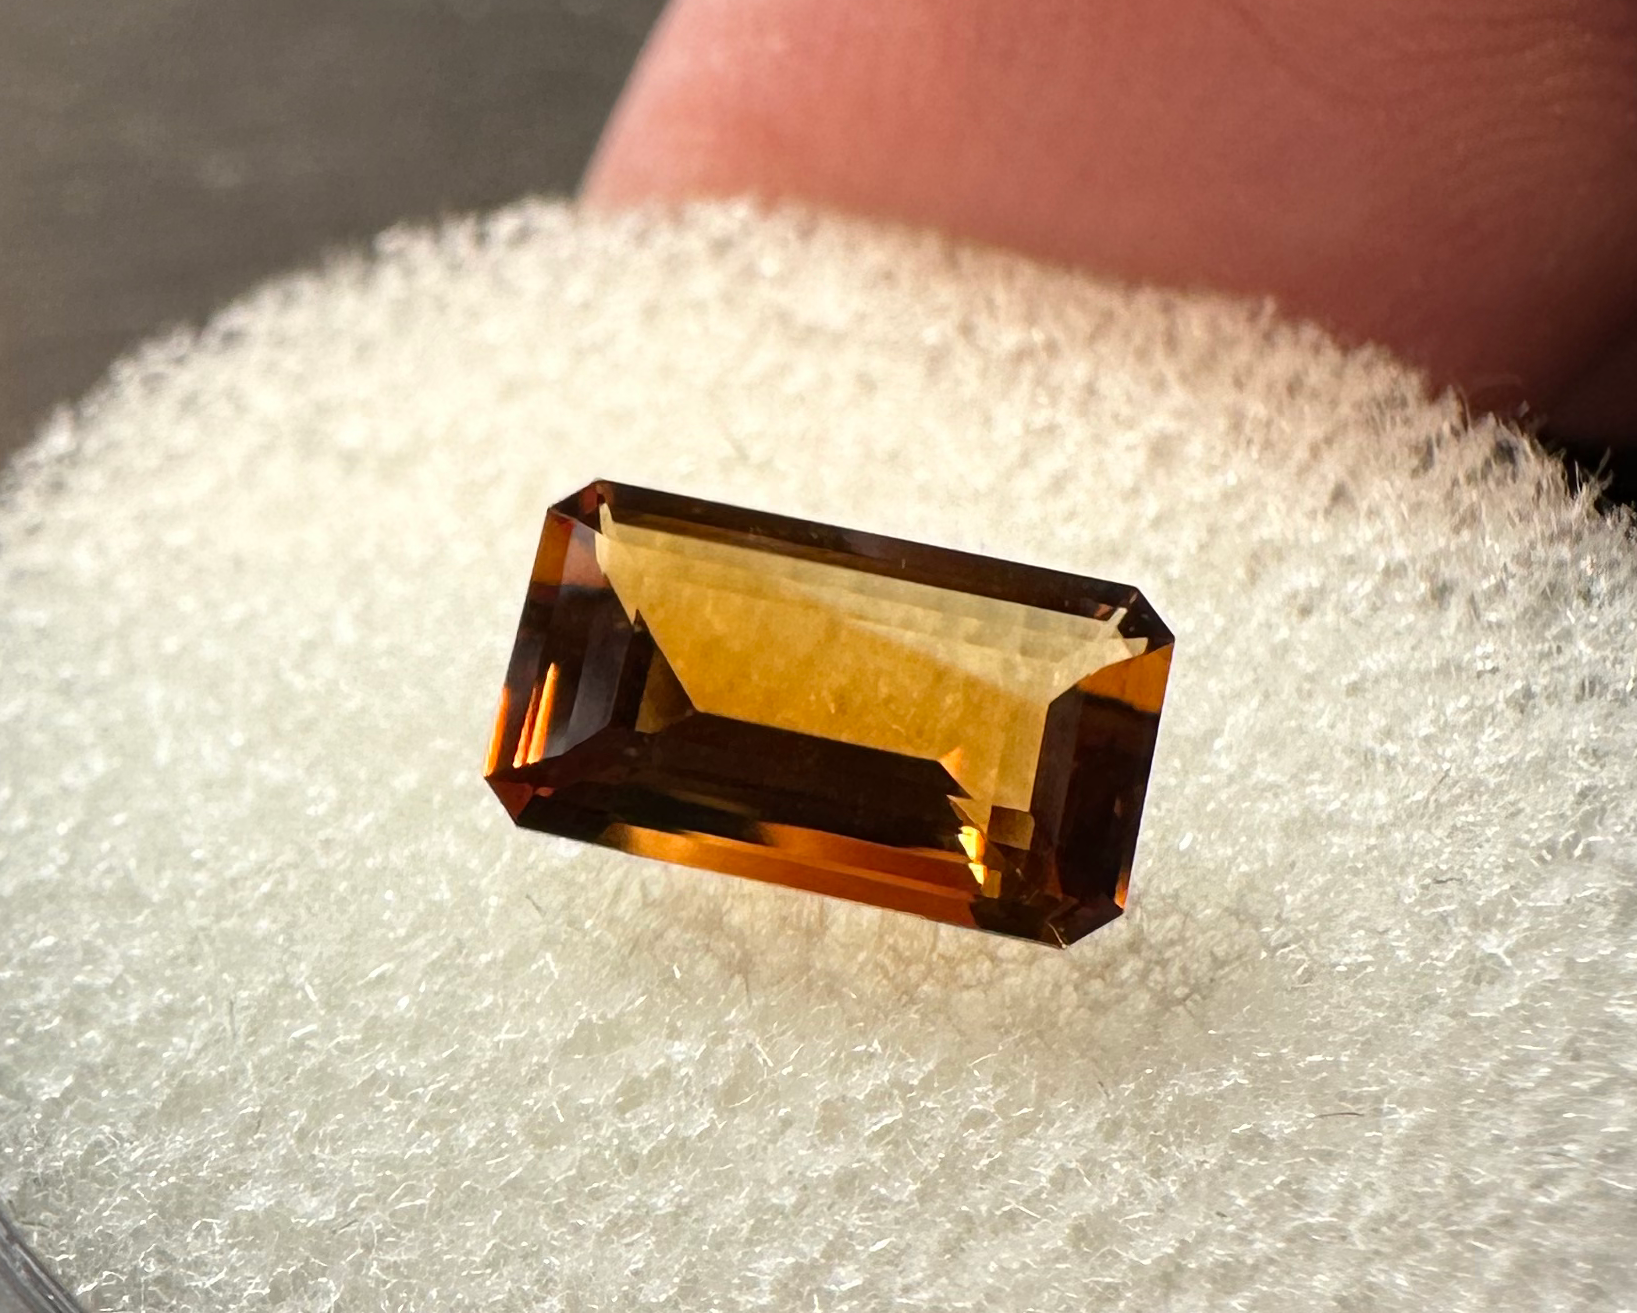
Below is how the gem looks after the table has been cut and polished. The color and clarity of this stone is almost flawless, and with no inclusions, though you can easily see color zoning in the completed gem. You can clearly see the bottom of the “V” dop used to hold stones with pavilions cut with a keel shape, such as Emerald Cuts, as well as the superglue I used to anchor the stone to the dop, attesting to its clarity.
Speaking of attaching a stone to a dop, I usually use Tom Herbst’s method of using dopping wax for the initial dop, and then when it comes time to transfer the stone to a new dop for cutting the crown, use epoxy glue for that dop. The reason being is that when it comes to remove the first dop from the stone after the epoxy had cured, very little heat is needed to pull the dop attached with the wax away from the stone (which could be detrimental to heat-sensitive stones should they get too hot). Removing the stone from the dop that was attached with epoxy after the crown has been completed is taken care of by letting it soak in acetone over night, and no heat is needed.
I will likely continue using that method for larger stones, but for smaller stones there’s a superglue out there now that is cured by UV light. When I use epoxy glue, I leave it to fully cure overnight. Even when I’ve used regular superglue for cabbing small stones, I leave it for an hour or so to completely harden (even after spritzing it with an “activator” that immediately hardens it). If I don’t, there’s a risk of the stone coming off the drop. I haven’t had that happen with epoxy, but I have with superglue when cabbing tiny Peridot using a carpentry finishing nail as a dop stick.
Other faceters have commented that the UV light hardens the superglue in seconds, and it’s safe to immediately start faceting the stone right after that. As no problems have been reported with it from what I’ve heard, I decided to give it a try, too. The glue actually included a small UV flashlight to use (which certainly did cure it fast), and I didn’t have any problems using it on this stone and am eager to try it with other stones.
One of the benefits besides being able to get to faceting sooner after dopping the stone (such as when using dopping wax) is that it also takes far less time soaking in acetone to remove the glue from your stone or dops. As mentioned, I usually let a stone dopped with epoxy soak in acetone overnight to remove it, but with this superglue it only took a few hours or so before the stone and dop were ready to clean up.
This gem started out at 8.15 carats rough, but finished up being .80 carats in weight and with dimensions of 5×8 mm. That’s a loss of 90% of my rough material that went down the drain hose and got dumped in the back yard, so I definitely have a ways to go in learning what designs are best suited for a particular rough stone’s shape! Most faceters try to have a loss of 80% or less of their material, which is considered quite average as even very experienced professional faceters rarely get more than 35% back out of their material in a cut stone.
At least with this stone (which cost me less than $5), I got way more than its cost out of it in experience, the resulting gem is beautiful in cut and color, and I know I would be able to recoup its cost if I were to ever sell the faceted gem or a piece of jewelry I use it in, so I consider it a win-win even with only 10% of it being the finished product out of that chunk of stone I started with.
By the way, “standard” rectangular gems of this size are usually cut to 5×7 mm and are sized for use in ready-made mountings, but as I am my own jeweler and make my own mountings, I can use whatever size stone I want, and I’ll take another non-standard millimeter of gem any day! 😉