
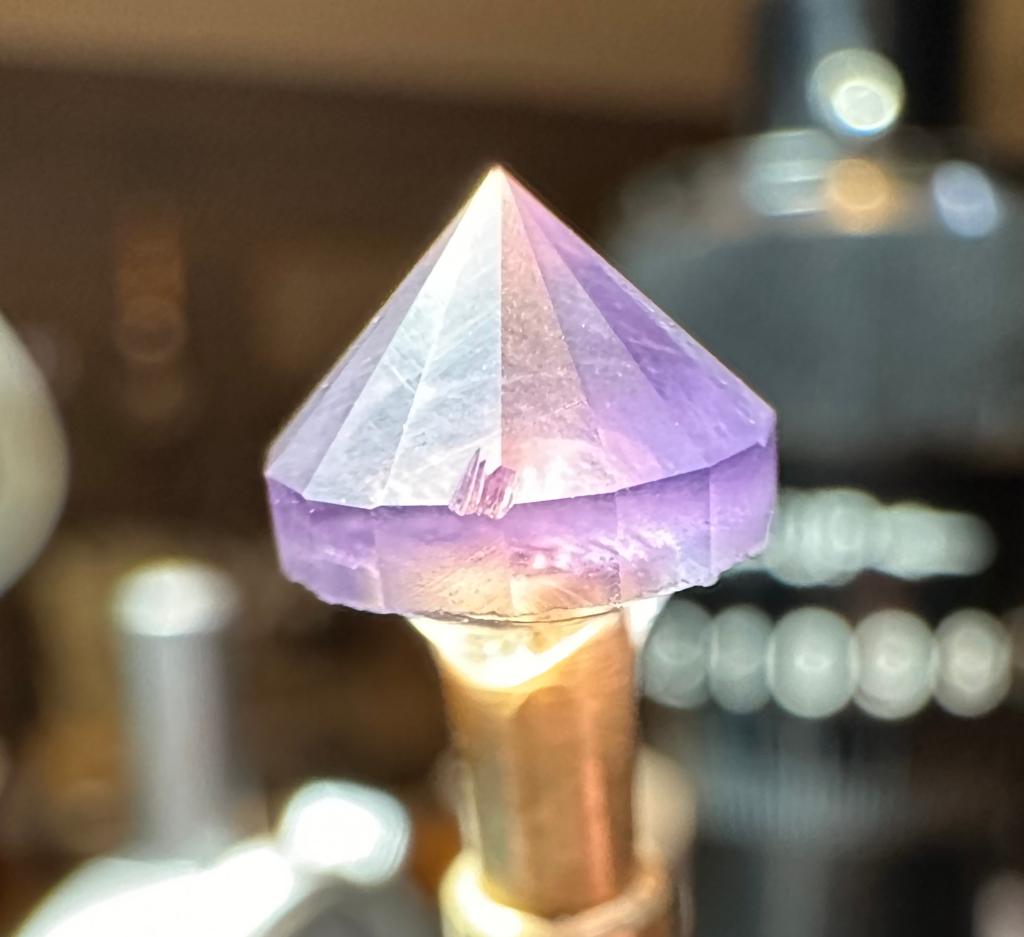
This Amethyst from Brazil is cut in a Standard Round Brilliant (SRB) design called Charles Schlagel Quartz, which was in an article by Jim Perkins included in one of the newsletters published by the United States Faceters Guild (Vol. 23, No. 4; December 2013).
The article, titled “The Quartz Study,” included four Standard Round Brilliant designs, the first design being this one, and based on angles for the crown and pavilion “main” facets determined to be best for quartz by Charles Schlagel, and published in an article by Charles Parsons in Gems & Minerals Magazine, March 1966.
Even though the design is called a “Standard Round Brilliant”, I’ve found that about the only thing “standard” about it are the count and placement of the facets (somewhat), not their angles, so there’s a score of SRB designs out there that were created for various gem types with varying crown height and angle, pavilion depth, etc., either to maximize the brilliance of a particular stone, or because the designer thought it needed to be that way.
The original round “brilliant-cut” is attributed to Marcel Tolkowsky, who developed the cut in 1919 especially for diamonds to show off their exceptional brilliance. The facets in the original design included 8 star facets, 8 main (or kite) facets, 16 girdle facets and the table on the crown, and 8 main facets and 16 girdle facets on the pavilion for a total of 57 facets.
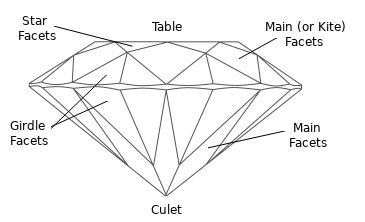
The “girdle facets” mentioned are facets either on the crown or pavilion that meet the girdle, not the girdle itself. A faceted girdle was not actually calculated into the original design as they were usually ground smooth around the stone, and did not include any facets of its own. Many commercially faceted stones in today’s market also don’t have faceted girdles, and are ground smooth but not fully polished.
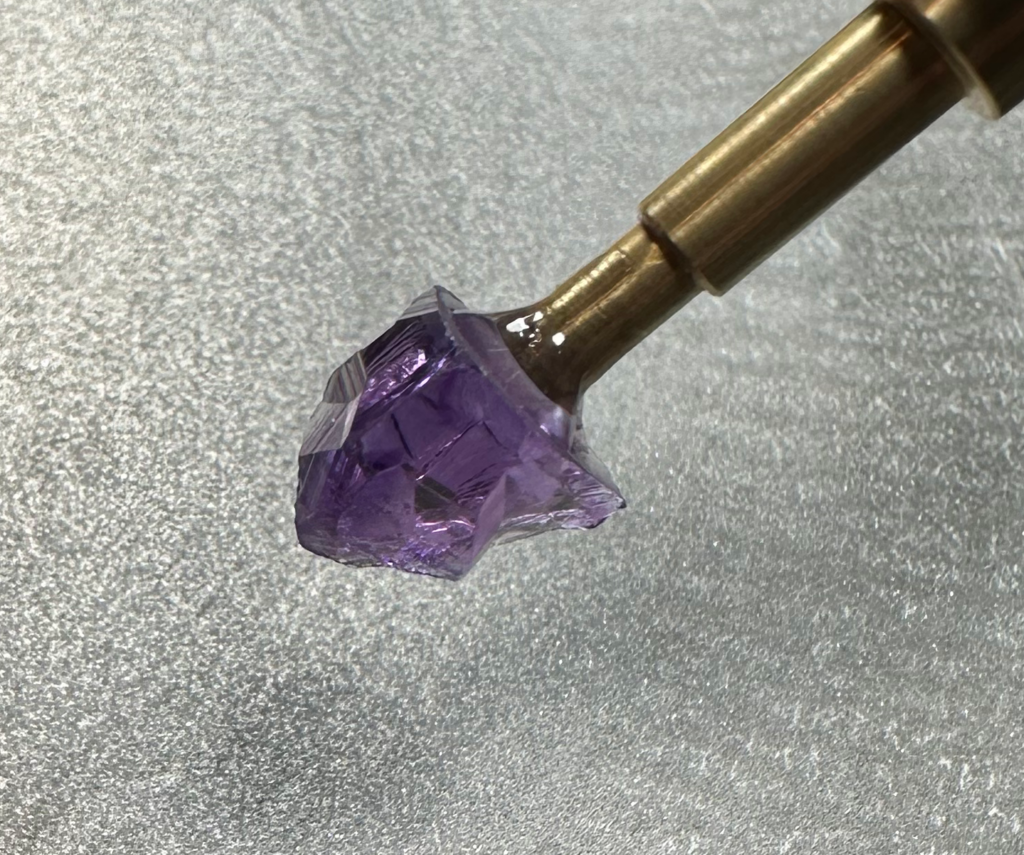
Even though I had inspected the rough in Benzyl Benzoate (a liquid with a refractive index of 1.568 that closely compares to that of a lot of gems so you can more easily see “into” the stone) to check if it had any inclusions, fractures or areas of color separation, sometimes they just get missed and a tiny fracture in this stone was one of those exceptions.
I was able to see that the deepest violet-purple in the rough was at a particular point which I planned to place at the pavilion to maximize the gem’s color (even though most of it would be removed in the faceting process), but I didn’t see any inclusions or fractures until I started grinding down what would be the table of the stone that gets attached to the dop.
The fracture didn’t appear to extend far into the stone, and I was thinking that due to the pattern of the fracture which would be on the edge and extend up to the top at an angle, it likely wouldn’t affect the crown since the design I’m using for the SRB has a shallow crown, so I attached the dop accordingly and started forming the gem on the 320-grit lap, getting rid of the big pockets and roughing in the facets.
Smaller pockets, inclusions or imperfections can be almost completely taken out with the 1,200-grit lap (leaving only very slightest imperfections to be removed with finer laps), as well as the bigger scratches left behind from the 320-grit lap, but all the while your reducing the weight of your stone, so that is why it’s better to work the smaller stuff out with the higher grits.
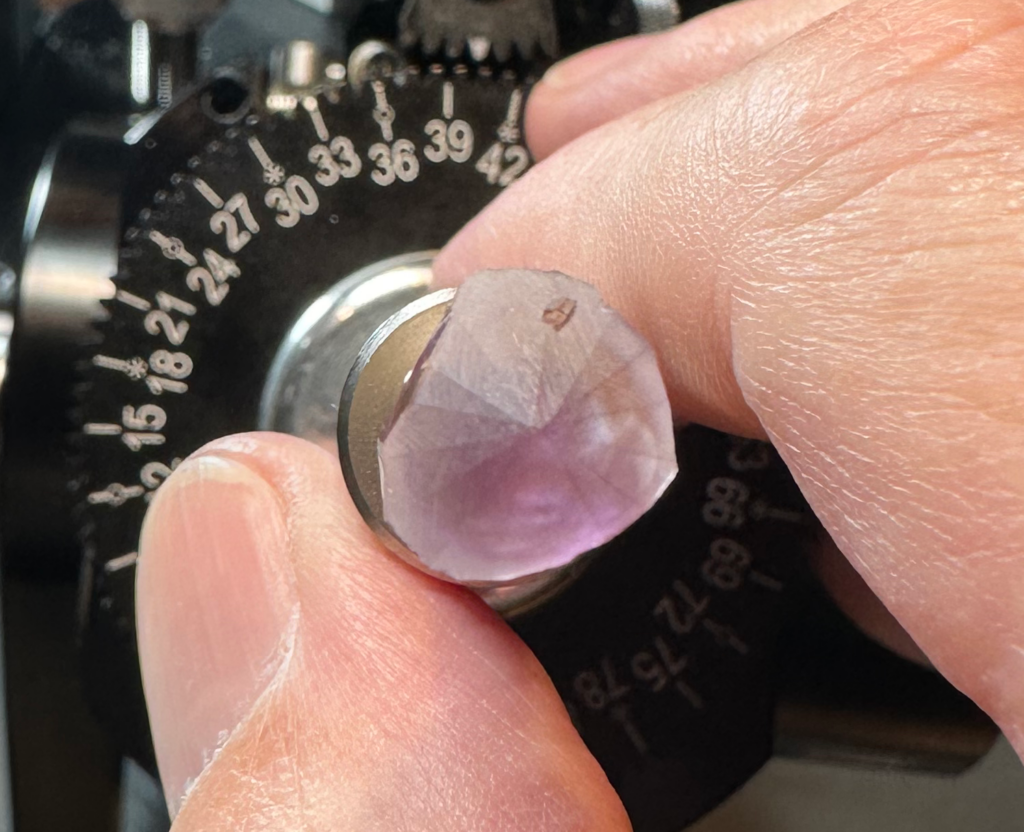
However, by the time I got the the 3,000-grit pre-polish lap I could see the internal fracture more clearly, as seen in the pic below (the fracture is circled in red). That is one of the problems faceters face when trying to minimize loss of their gem’s size or weight… sometimes you just don’t know what’s in the box waiting for you until you open it up. 😉
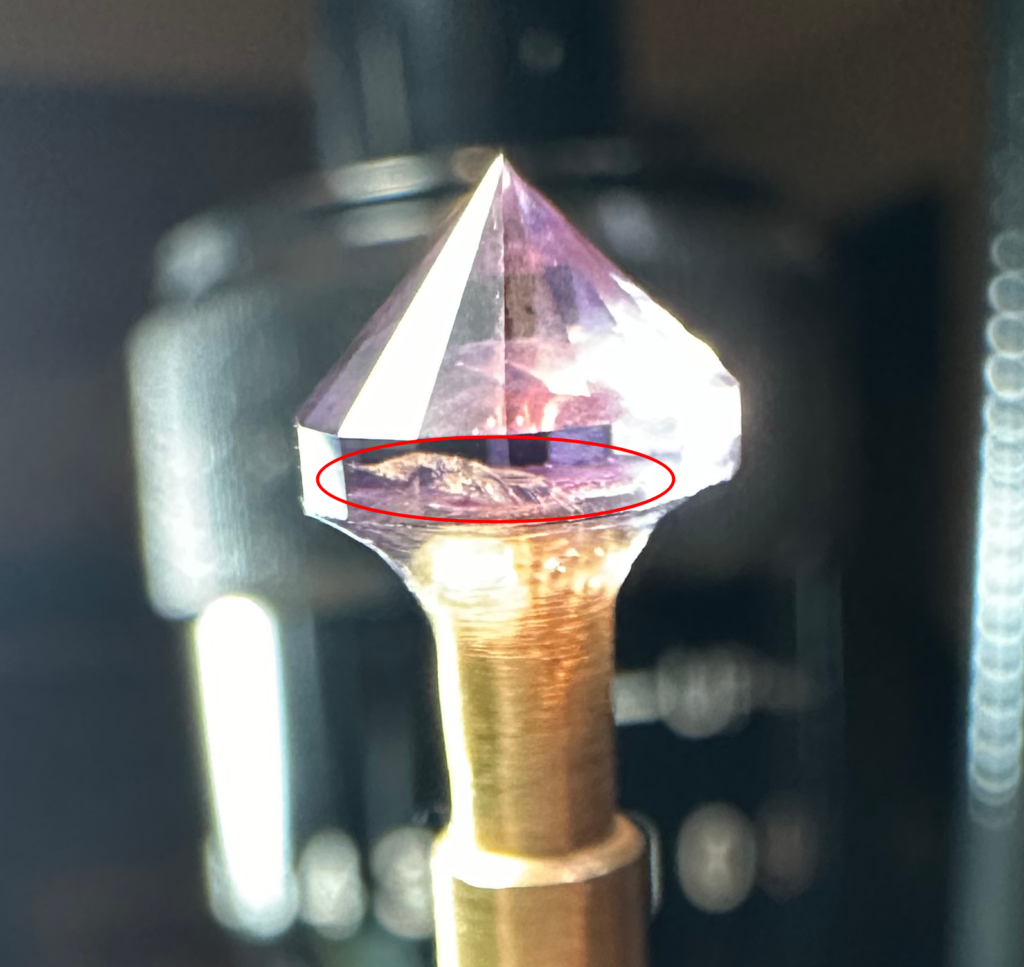
When you see the fracture in the interior of the stone from what I call the “front view” above, it’s hard to tell just how much of the crown would be affected, but when you rotate the stone so you can see the fracture from the “side view”, you see that it clearly is just on the edge and is sharply angled so it shouldn’t affect the crown. But, where the fracture actually comes out to the girdle’s edge it does not leave much room for the girdle at all.
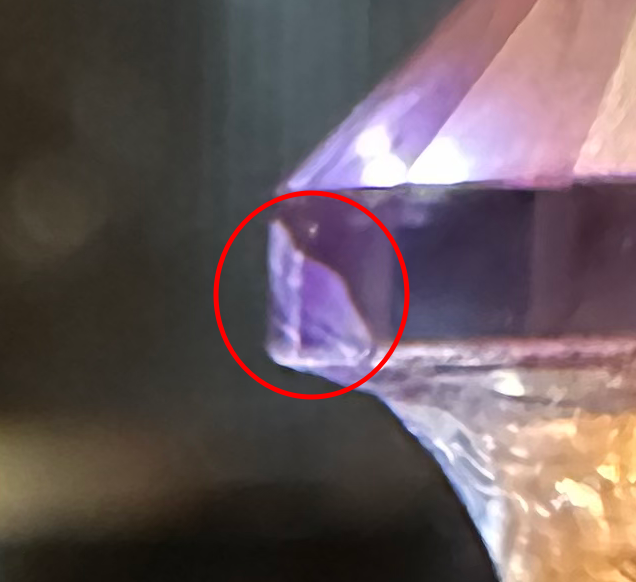
I knew I would have to bring the girdle in just a tad more, otherwise after polishing I would be left with a razor-thin girdle which would too easily chip when set in a mounting. This brought my hopes of having a 7.5 mm diameter stone to an abrupt end, but I would much rather have a good girdle on the stone than have it chip when setting (which when re-cut to remove the chip would no doubt leave me with a stone a LOT smaller in diameter, for sure!).
I originally brought the girdle in to give me what I thought would be enough material for a nice girdle thickness, and which would leave me with a stone around 7.0 mm in diameter, but after finishing the pavilion and transferring dops to start on the crown I found that I was right, and the fractured piece was only held on by the superglue.
Unfortunately there was a “pit” that was left behind that I just couldn’t grind out. I took the girdle as low as I could, and even adjusted the angle of the crown “girdle facets” from 43.50° to 43.00°, and even tried 42.50° but still couldn’t get rid of what I called a tiny “snowflake” with an attached “micro-canyon” that would have been clearly visible on the polished facet. And, it wasn’t in a position that could have been ground out for one of the “kite” facets, either. 😕
So, I bit the bullet and transferred the gem back to the other dop and re-ground the girdle again, ruining the “main” facets I had in place on the pavilion, but insuring I had plenty of girdle to bring the first tier of table facets down enough to grind out the “snowflake” and “micro-canyon”. I started to just cut the pavilions “girdle facets” back a little, which would have allowed me to re-cut the “main” facets with girdle meet-points, but I wound up getting some deep scratches on one facet that had me almost take it to the center point. Calling it fate, that’s what I decided to do with the rest, and basically re-cut the entire pavilion from start to finish for a second time.
After transferring the stone (again), the first facet I re-cut (at the correct angle) was the one with the damage, and which was removed, leaving me with plenty of girdle to spare. I could have scrimped on enlarging the girdle, but the last thing I wanted to have happen was to have to go back and grind it down even more, so instead of taking the stone down to just 6.5 mm (which likely would have worked), I took it down to 6 mm.
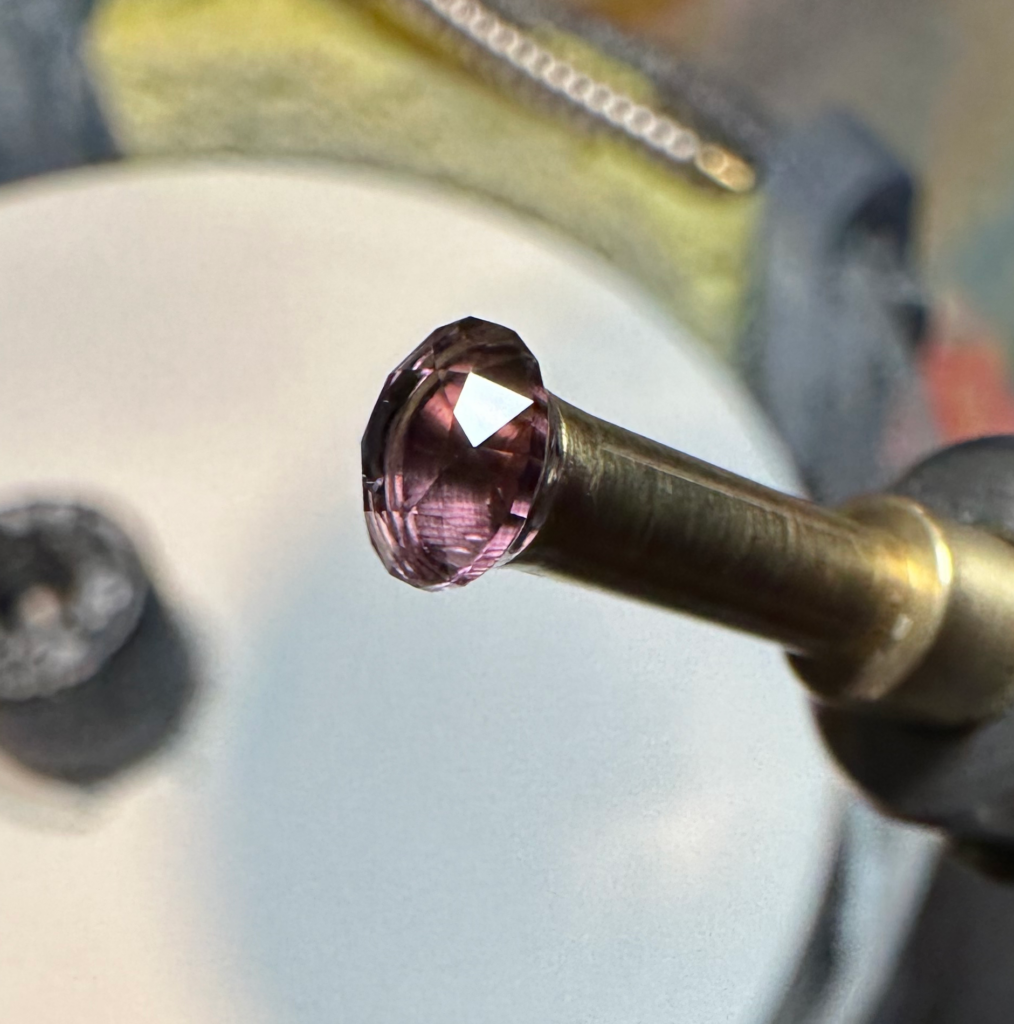
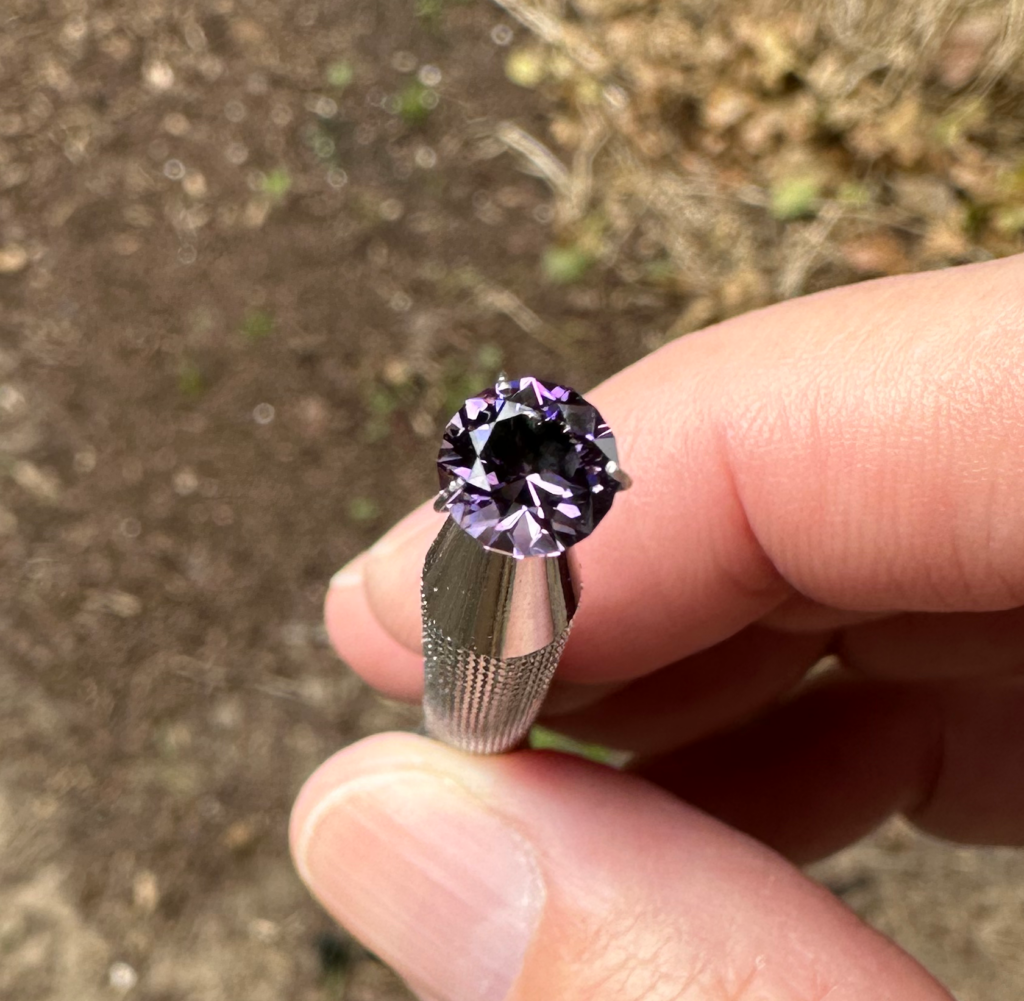
The rest of the table facets were cut-in just fine, and in the end I had a beautiful 6 mm diameter Amethyst weighing in at 0.85 carats that sparkles with purple, rose and blue hues so much I’m in awe. Seriously, I didn’t expect this kind of sparkle and flash to be coming from a quartz gem, and if I didn’t cut it myself I would have guessed it to be Cubic Zirconia, not Amethyst!
The picture of the completed gem at the top of the post doesn’t do it justice by a long stretch, and although I have a few other Standard Round Brilliant designs that were altered for quartz’s refractive index that I’ll be cutting in the future, I am already certainly very impressed with the Charles Schlagel Quartz design.
Two other designs highlighted in “The Quartz Study” article (also by well-known master faceters) highlight changes in angles that came about with advancements in technology… the Quartz Round Brilliant design by Edward J. Soukup (“Facet Cutters Handbook”, December 1986) and a design by Glenn and Martha Vargas, the Glenn & Martha Vargas Quartz design (copyright 2002) from their book “Faceting for Amateurs”, Fourth Ed., pg. 76.
However, the next SRB I cut in quartz will use the Jim Perkins Bright Quartz design, which is also included in the article (and the highlight of his study). The design was created in 2012 using CAD and ray tracing in determining the best angles for quartz, so I am very eager to try that design, too, which could result in even better pizzazz and sparkle with the improved angles for quartz’s 1.54 refractive index! 🙂