Pattern wire can be a lot of fun to work with. However, I always like to give it a little something “extra” when I can.
Sterling silver Western Floral pattern ring, banded with hammered stacker rings
In this case I took two hammered stacker rings of the same inner diameter needed and soldered them to the outside edges of some Western Floral pattern wire stock after it, too, had been formed into a ring. I then filed down the inside edges to round them slightly for an extremely comfortable ring to wear.
This picture was taken after the ring had been oxidized and polished, so you can easily see how the Liver of Sulfur patina can really make the designs in the pattern wire stand out.
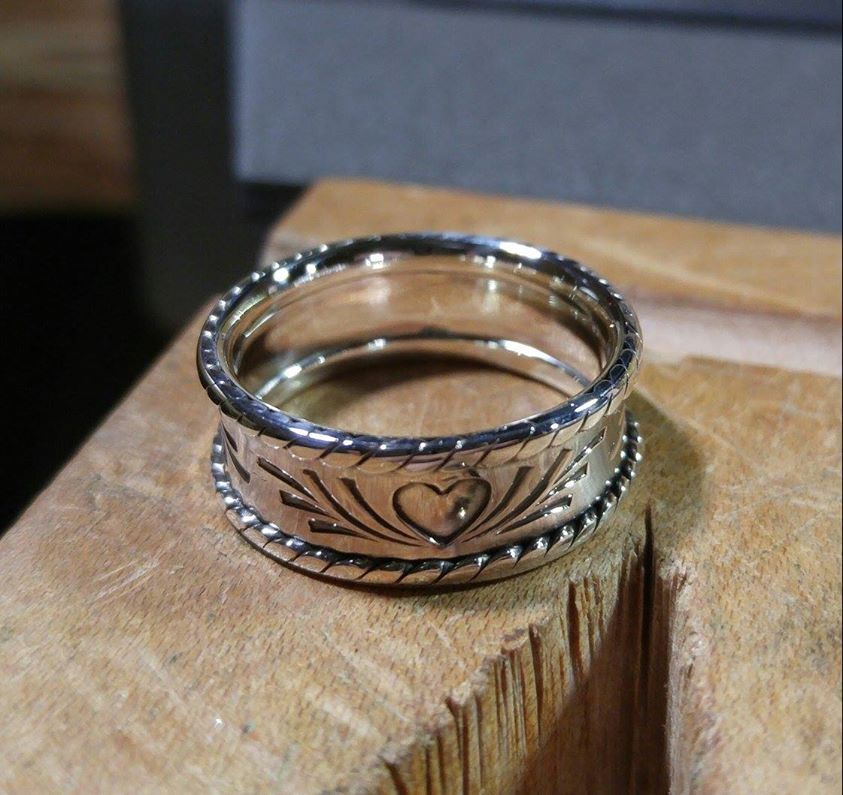
Another Valentine’s Day gift. This one created in sterling silver with Tole Heart patterned wire that I bordered with twisted rope and slightly hammered down to make for a pretty comfortable ring to wear, and with a perfect theme for the day!
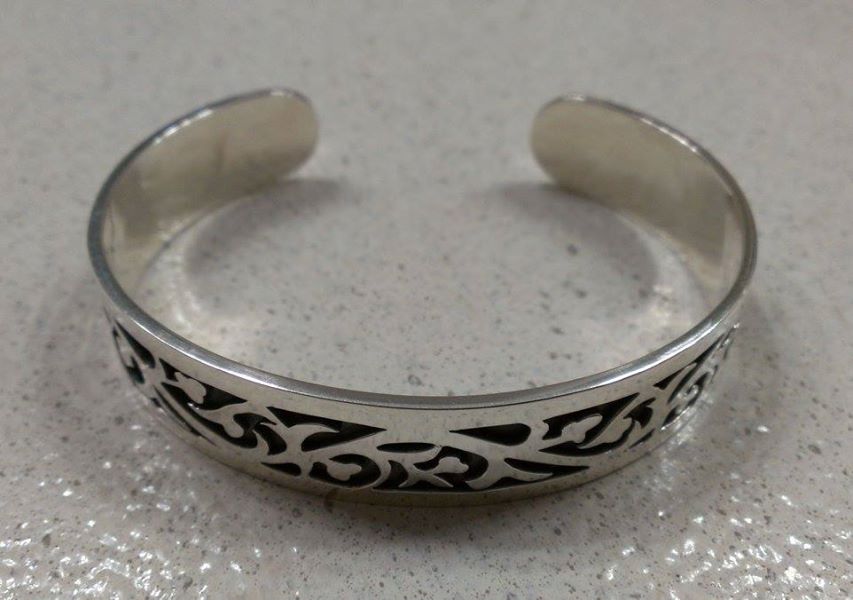
A sterling silver Overlay Scroll Cuff made in 2014…
A sterling silver overlay scroll cuff
It was definitely a challenge, but I was inspired by the work of Harufumi SHIRAKI demonstrated in one of his YouTube videos.
Seeing him working with his saw also enlightened me that a long, flat bench pin with about a 1/8″ slot down the middle for a few inches or so makes piercing cuffs, bracelets and long items sooooo much easier than with a “normal” V-slot bench pin, which often restrict you from using certain angles or areas on the pin due to its shorter length and/or openness of the “V”.
So much so, that after I made one and started using it, I now find myself constantly swapping between it and a “regular” pin on literally every project since, using it for the vast majority of my piercing work now, and don’t know how anyone can do without one!
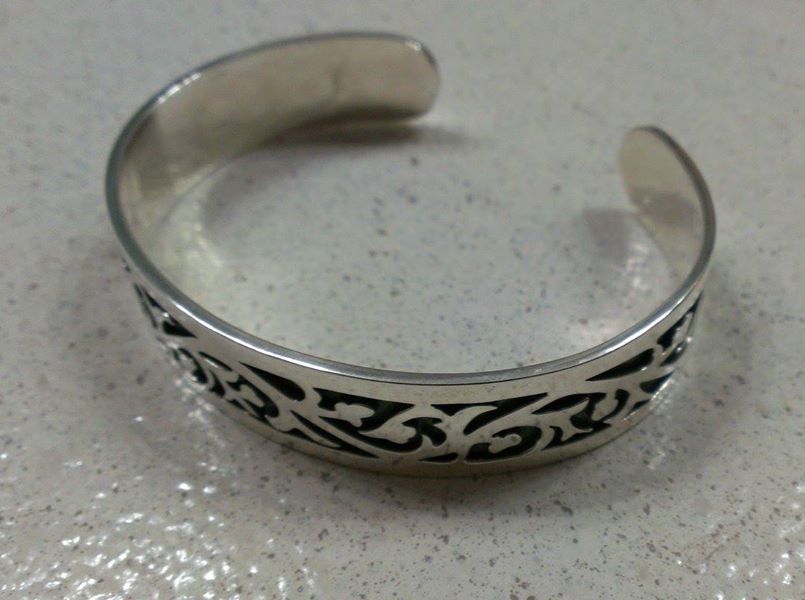
Side view of the sterling silver overlay scroll bracelet
For this cuff I drew out about an inch of the scroll pattern on paper with ends that would match up to each other, then scanned that and paste/fit the digital pieces together to create one long continuous scroll, then printed the pattern off for use as the template.
Using both 6/0 and 8/0 blades to pierce the top layer with tight, sharp corners took a lot of patience (and not to mention more than a few blades!).
It turned out really nice and is one of the pieces I’m especially proud of to this very day, although my photographs certainly don’t do it justice. 🙁
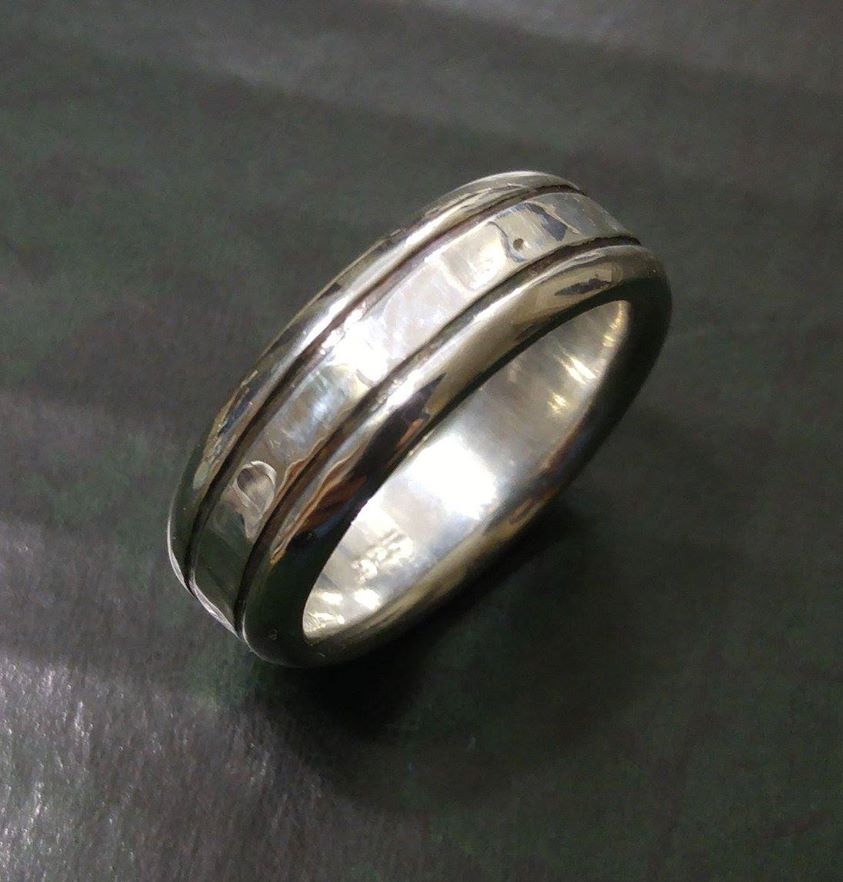
A sterling silver Wedding Ring I created for, and along with, one of my nephews, Torrey…
Sterling silver men’s wedding ring
After some scrap sterling was melted and poured into an ingot, it was then rolled and forged into a band, soldered closed then filed and formed on the inside edges for an extremely comfortable fit.
I smoothed the outer edges as well, but left the hammer marks from forging on the inner area to give a little play with light. The two grooves were created with a jeweler’s saw deep enough to hold an oxidized patina, and add a little extra style to what would otherwise have been a somewhat plain band.
Torrey thought the ring turned out absolutely wonderful. And, not only was he there during entire fabrication process and contributed to the ring’s design, but it was a handmade gift from his Uncle for a very special event that I hope he’ll keep and cherish for a very long time!
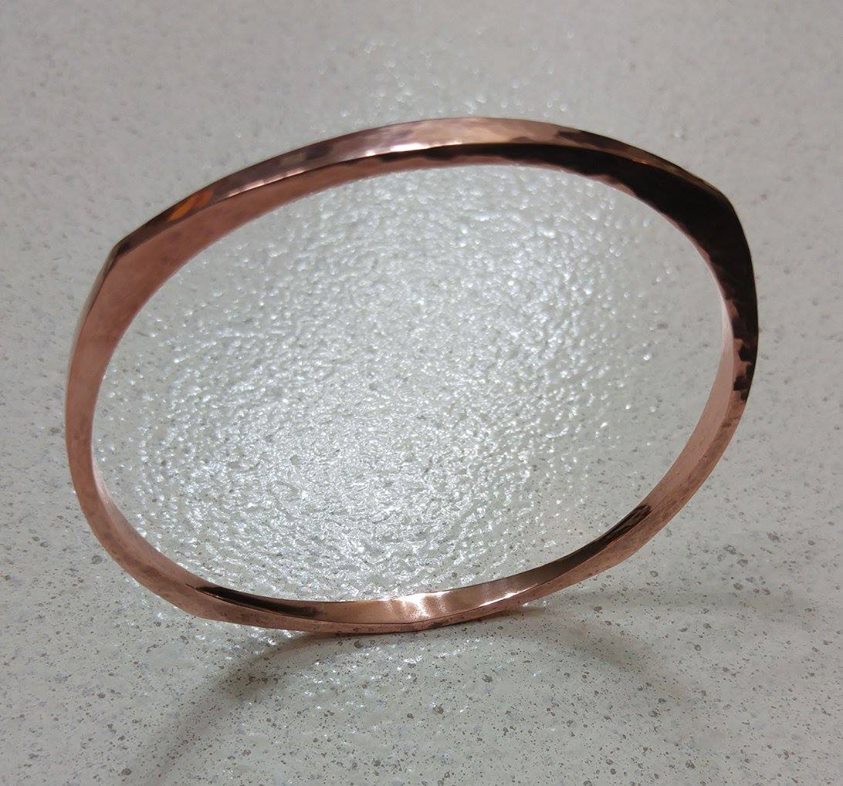
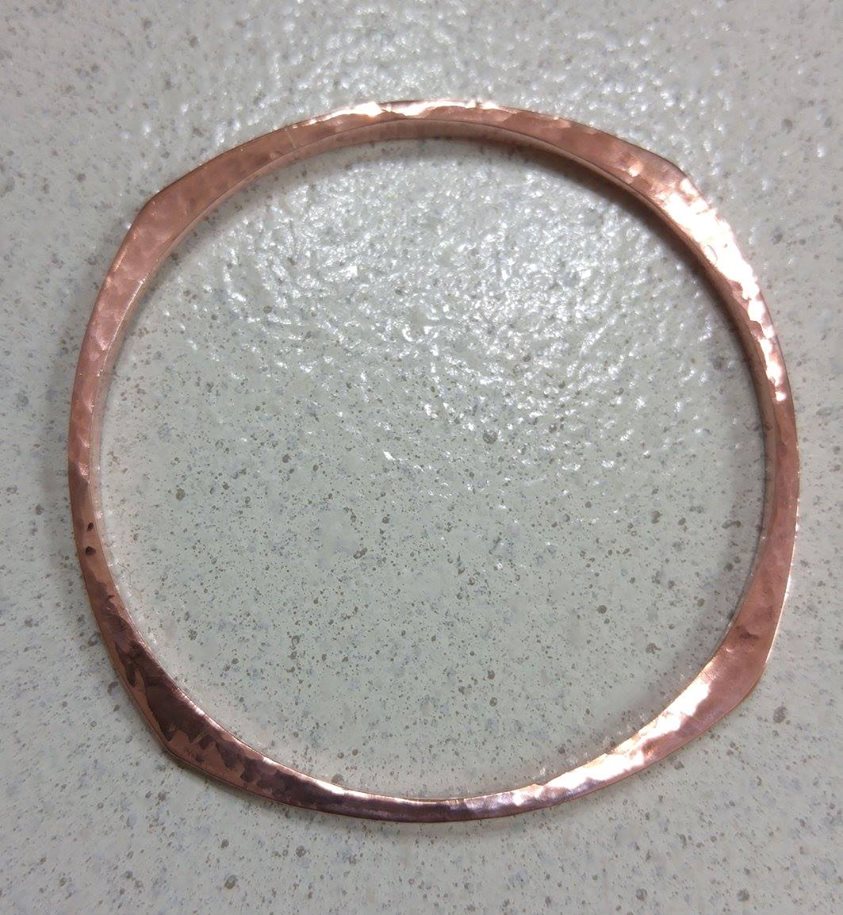
Here are a couple pictures of a Radial Forged Bangle that I fabricated from heavy-gauge copper wire…
Slanted top-view of the copper radial forged bangle.
The geometric design is achieved from radial forging, continuously alternating from sections on the sides forged on a round bracelet mandrel, to sections on the top surfaces forged on a domed anvil until the desired design and size needed is eventually reached.
The forging hammer marks are left on the sides and top surfaces, but the bangle’s inside is sanded smooth, and then the entire piece buffed and polished.
Side view of a copper radial forged bangle. I’ve since made quite a few of these for family and friends.
Created from 6 gauge wire stock purchased from the local hardware store, the material for this project came out to about 85 cents, so it’s certainly not an expensive project to complete in that regard.
This bangle is also the first project out of Alan Revere’s most excellent book, “Professional Jewelry Making”, although I have also seen bangles like this advertised by at least one well-known retailer for $200 in sterling (which are made in the very same way with the same amount of effort, but just with a more expensive metal alloy). 😉
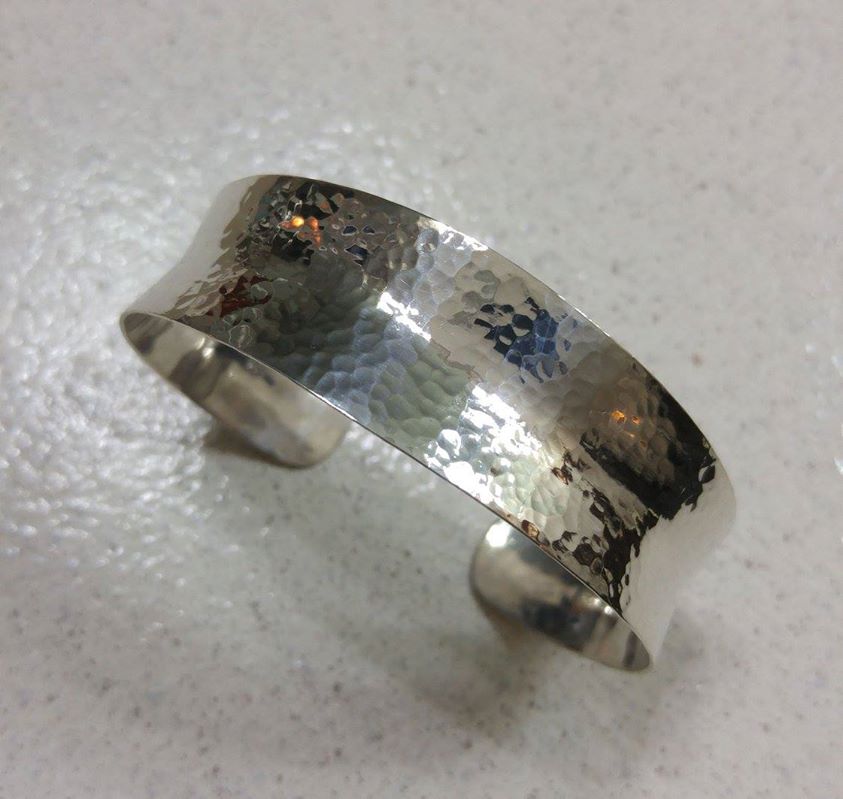
A forged sterling silver anticlastic cuff with hammered texture.
After forging the cuff, leaving in the hammer marks from the chasing hammer, it was then formed using a wooden forming stake and a Delrin “dead-blow” cross-peen hammer to give it the anticlastic curves without removing the forging marks, allowing it to have even more ability to play with light and reflections as it’s worn.
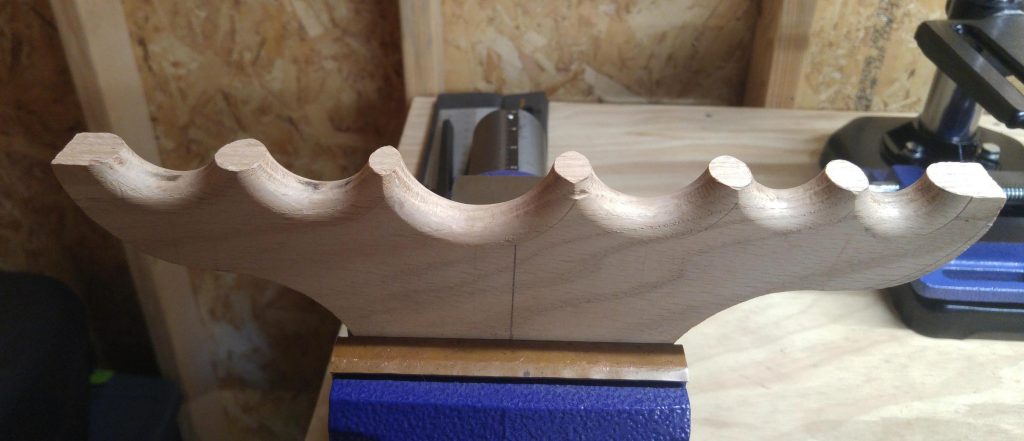
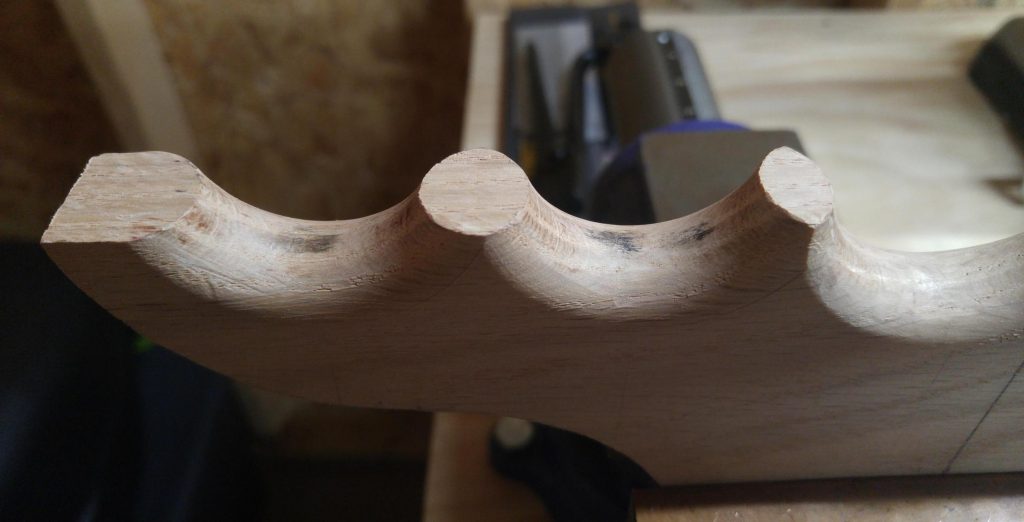
I didn’t have any anticlastic stakes for forming this cuff, but thanks to a YouTube video by Torch Song, I made myself a couple of wood forming stakes that look like little Bullwinkle horns, and using one of them to form this cuff worked great. 😉
Making the wooden stakes is not at all difficult. All that’s really needed apart from a couple hours or so of free time is a hardwood board of adequate size, a ruler, a pencil compass, a drill with hole-saw attachments of various sizes, a regular hand saw, a half-round rasp and file (a “4-in-1” rasp/file combo would work well), and some sandpaper in course, medium and fine grits.
I used some scrap 1″x10″ oak board about 12″ long, and as I had the hole-saw attachments from past household jobs, including a hand-held router, drill and table saw at my disposal, the build was even easier for me as I was able to bypass a lot of the rasping, filing, sawing and sanding that you would need to do if you don’t have those tools.
With the tools, supplies and the board in hand, draw a line down the center of the board’s length and evenly space centered circles of various diameters that you have hole-saw attachments for down the line, leaving plenty of space between the circles and the bottom of the board for support, as you’ll be banging metal on them and don’t want the stake to break there.
Using the hole-saws, drill out the circles, then cut the entire board in half lengthwise with a straight saw and you’ll have two identical halves with half-circles cut out down its length. Using the half-round rasp and file, round off the edges of the half-holes in the stakes, finish smoothing them out with the sandpaper and you’ve got yourself an anticlastic forming stake!
By securing one of the stakes in a vise and using the half-circle valleys in the anticlastic stake you can shape the cuff, which will take on the form of that valley’s rounded walls as well as start the bending of the metal into the circular cuff shape. Below is a close-up of the few valley’s in the stake I used to form this cuff…
You have to be careful to work the metal evenly though, so that the two ends of the cuff work to meet each other, otherwise you will wind up with a corkscrew shape with one end headed in one direction and the other end headed in the opposite direction.
If that problem seems too difficult for you to overcome when you first start forming anticlastic cuffs, you might try bending the flat metal (cut a little longer than you need for the cuff) around a regular bracelet mandrel and soldering the two ends together to make a closed bangle.
Then, slip the bangle over the end of the stake to the desired valley (you may need to trim the underside of the stake, depending on how wide of a board was used), and when you start forming the anticlastic curves you can be sure the ends will always meet because they already are! 😉
When you’re done with your anticlastic forming of the bangle, cut out the portion that includes the soldered seam for the open area of the cuff and very little tweaking should be needed to align the two ends perfectly. Or, leave it soldered closed and keep it as a bangle if it’s the right size!
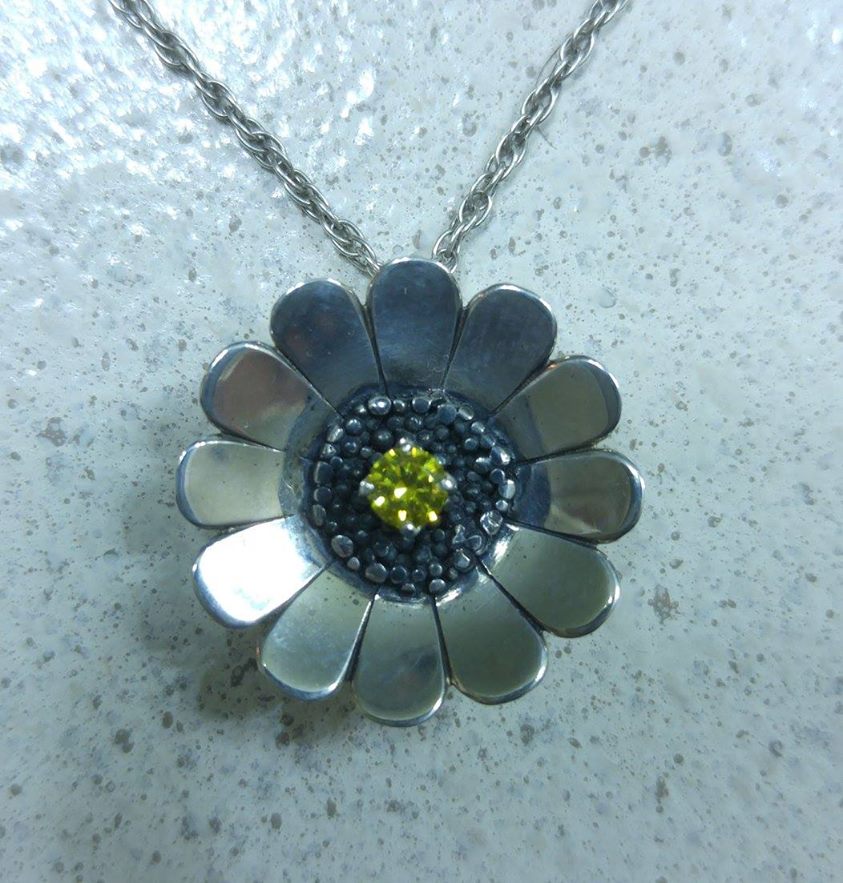
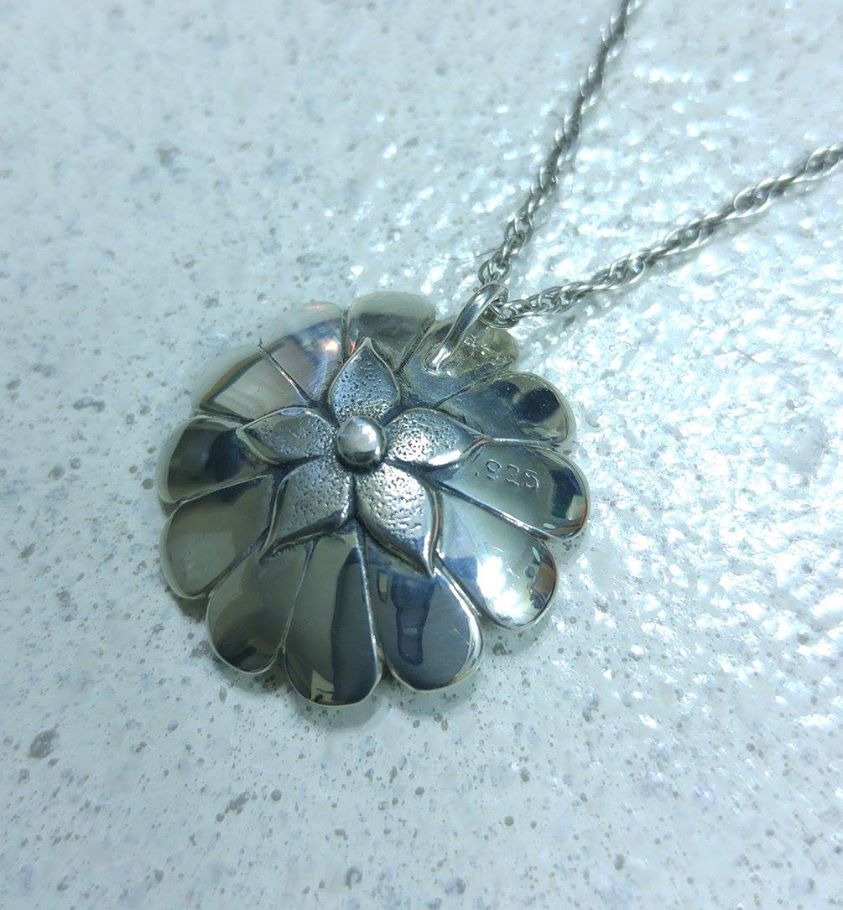
A multi-layer Sunflower Pendant from 2014 having a granulated center (I wasn’t at all happy with how THAT turned out) around a faceted 5 mm yellow Cubic Zirconia set in a crown prong setting. All components were fabricated separately from sheet or wire.
Sterling silver Sunflower pendant with yellow CZ, front
The backside of the Sunflower pendant turned out great though. The sepal was textured with sandpaper and a hammer, and the stem was cut from a few millimeters of wire and textured with striations to give it a realistic appearance. The sepal and stem were then domed and soldered to the back of the flower (also domed), and a bale of round wire invisible from the front accepts the chain.
Sterling silver Sunflower pendant with yellow CZ, front
The granules and prong elements on the front of the flower were soldered on last while the flower rested in a depression on the charcoal block. And, I know now what I should have done to get the granules properly fused to the flower (and I should have made them smaller, too), but my wife loves this “prototype” just as it is, so it was saved from getting tossed into the scrap bucket and the stone was set. 😉
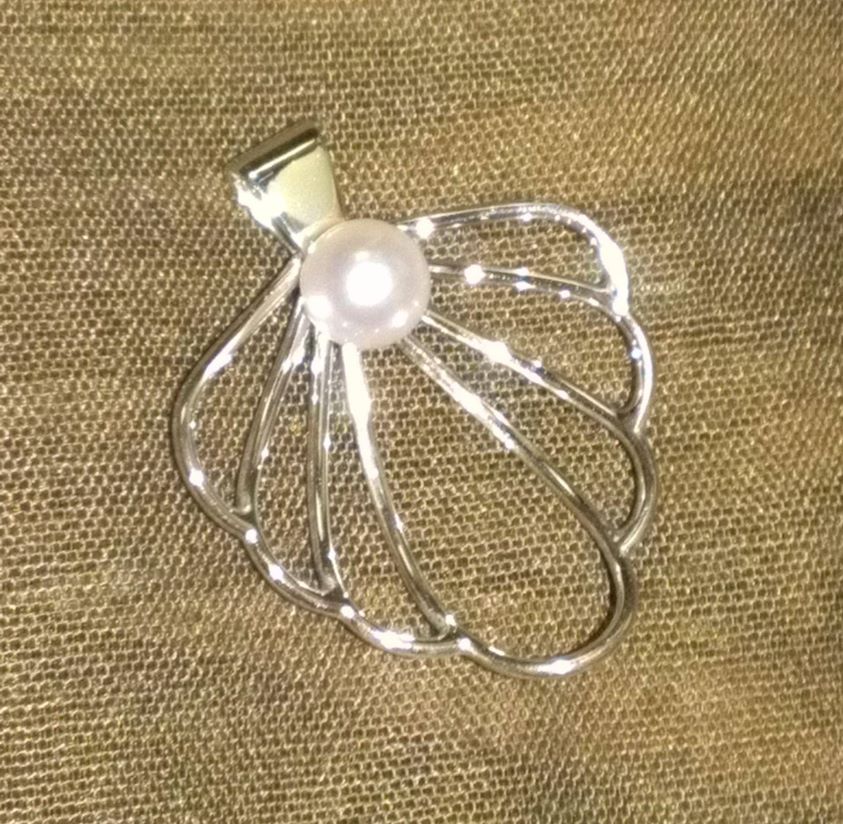
Below is a picture of a simple wire-form shell pendant I created with a natural pearl set in the center, and is another one of my early 2014 projects. It came straight from one of Soham Harrison’s YouTube videos (thank you Soham!!), though I deviated on the bale… I think mine makes for a better fit with the style. 😉
Sterling silver wire-form shell with pearl
I’ve picked up a LOT of great information from online videos and magazines (YouTube and Vimeo are virtual goldmines). Aside from what I had learned looking over my brother’s shoulder when he got back from his beginning silversmithing courses in Roswell, NM back in the 70’s, everything else was more or less self-taught from a few books.
With the addition of online videos and modern magazines and books that are available now, my knowledge and skills in metalsmithing have increased dramatically.